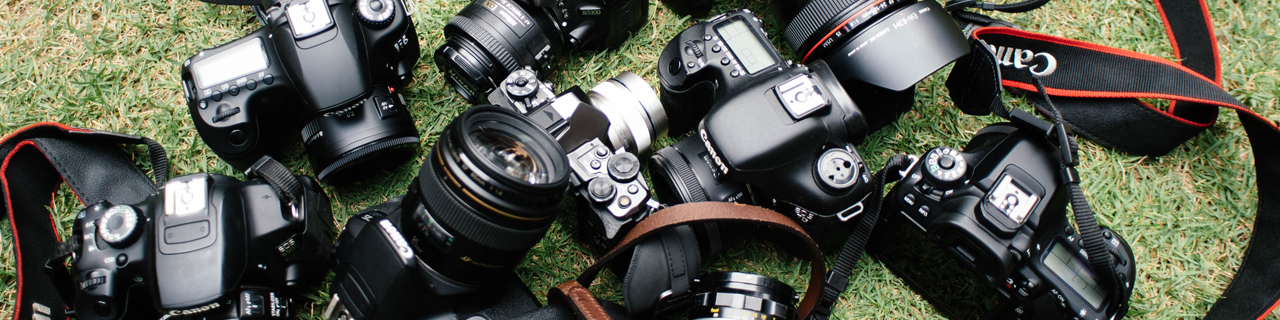
ON-SITE REAL ESTATE PHOTOGRAPHY TIPS & TRICKS
Once you have the correct gear and have mastered the settings on your camera, it is now time to focus on methods for taking good photos. Having expensive gear won’t make you create amazing real estate photos, it is about knowing the correct angles, photo compositions and set up.
Great real estate photographers have a talent for telling a story about a property, by capturing unique elements. Everyone has their own style, so the more you practice the better your photography will become. By following these simple on-site tips your property photos will look amazing.
Pre-Shoot Packing
Real estate photography can be time-consuming, therefore it is important to be well prepared prior to
- Pack an umbrella – You can always do shoots in the rain (BoxBrownie.com can edit out rain spots easily), but your camera equipment needs to remain dry.
- Maintain your tripod – Make sure your tripod legs are tight and secure, no loose bolts. You need to ensure your tripod is steady to take clean shots.
- Spare battery – This needs to be fully charged and ready for the days shoot. If you only have one battery it is best to take them out of the camera after you have used them. This is just in case your camera is left on and drains your battery.
Tip: It is a good idea to have a spare battery fully charged, for both your camera and flash. Flash backup batteries are more important than camera batteries, as they run out faster. You should be able to do 6 to 12 photo shoots on one camera charge. Replace flash batteries after every two to three
- UV Filters - Filters are great to use on all your lenses to protect them from dust and scratches.
- Your memory card is in the camera – Don’t accidentally leave it in your computer. Always carry a spare in your camera bag.
On-Site Shoot Tips
When you get on-site to shoot the property, there is likely to be a few things you’ll need to do. By following some simple points, you will reduce the amount of editing required to your final images.
- Park a few houses away – This will ensure that your car won’t be in your shots.
- Be aware of what is outside the windows – It is important when shooting interiors that you are aware of what is outside the windows.
- Meet and greet owners and real estate agent – Walk around the property and plan your shoots. It is also a good idea to ask the owner and the agent what features and angels they want to include. Ask lots of questions about the property as it will give you a good insight into features that will sell the property. Turn on lights, adjust blinds and remove items – Do a full walkthrough of the property to work out your shots, while you’re doing this adjust any items in the home. Remove as many personal items (eg. Photos, kid’s paintings etc) as possible, to make the shots more professional. That way you simply just walk through and take the shots, not wasting time moving things in each room.
Tip: If you can see the neighbors or it is a residential area, adjust blinds so that the top of the fence meets the bottom of the blind. This way you’re blocking the neighbors from the shots, but not hiding anything, adding a feeling of privacy. Obviously, if the view out the window is amazing
Tip: If they have Venetian blinds, don’t fully close them, as it may appear as though you’re hiding something. Partially close the blinds so light is still coming through making the shot softer.
- Wipe down camera lens – This reduces dust spots that can appear in the final image. We can always edit these out if they do appear.
- Shoot in Landscape format – Never shoot real estate shots in portrait, even if you’re shooting a tight bathroom. Most of the time landscape will be the shooting preference for all images. Always ask the real estate agent if they do require any portrait lifestyle shots.
Tip: It is easier to use your Smart Phone for any close-up ‘feature’ shots of the property rather than using your DSLR, but only do this if you have a newer version of Smart Phone.
- Tenanted properties – Always ask if there is furniture or areas of the property that they want excluded from photos. Make sure you also ask them if it is ok to move minor items.
Tip: Allow extra time if you are shooting tenanted properties, as they generally aren’t presented the best and take a little more time to photograph.
- Open all doors – Keeping interior doors open for shots creates depth and space. The same applies with sliding external doors, open them up to make the room feel bigger and create a cleaner shot.
Tip: Keep sliding windows closed so that there are less lines in the window in the final shot.
- No onsite power – Sometimes properties have been vacant a while, so there may be no power. This is no big deal, the shoot may take a little longer and just make sure you use a flash for all your internal shots. In bathrooms, its best to use the flash to focus on the main subject, and then turn it off to take the HDR sequence.
Tip: If the power off and it is dusk, don’t worry if you can’t reschedule due to deadlines. Simply shoot the interior of the home as usual, with flash and shoot the exterior earlier and simply use the BoxBrownie.com Day to Dusk edit to get the best dusk shot.
- Changing lenses – If you need to change lenses on-site, it is best to tilt the camera up (LCD facing you) so the lens/body is face downwards like you are taking a picture of the ground. Hold this position and switch the lens without moving the camera body, until the lens is attached. Changing the lens this way reduces the amount of dust that can get into the camera body. You can also do this while the camera is on the tripod.
- Straighten furniture – Ensure all cushions and furniture are straight, this applies to linen in bedrooms. Pushing in kitchen chairs and stool will make your images look neater.
Tip: Stage outdoor areas with a bottle of wine and glasses on a table setting. Less is more in photos, but a simple addition to tables can make a setting look great.
- Remove pool and BBQ covers – Removing covers from outdoor settings and pools makes the photos look neater, if something is old leave the cover on.
Tip: If the pool/spa cover can’t be removed, BoxBrownie.com can edit the image to place fresh, blue water in the pool.
- Remove decorations – Always remove calendars and festive decorations. These will date your photos and buyers will know when they were taken, therefore how long the property has been on the market. It means that it is also difficult to reuse them if needed.
Tip: It is always good to de-personalise rooms, by removing family photos, religious and sporting memorabilia.
- Removing rugs in rooms – Removing rugs can create the feeling of more space, always do this for bathrooms as it makes them feel bigger. Do the same with excess door mats.
- Semi-wet patios – If exterior patios are starting to dry in patches after rain, it is a good idea to hose them down so that the colour is all even. Giving your image an overall, even wet look.
- Removing real estate signs and bins – BoxBrownie.com can easily edit out bins and real estate signs in final images, so there is no need to move them yourself.
- Re-shooting a property – If the property has been for sale for some time and you are re-shooting it again (because the agents wants to freshen up the marketing), ensure you ask plenty of questions on how they’re marketing the property. They are likely to want to try another approach with the images.
Tip: It also helps to ask to see the old website link. This will help you to see what they had been doing before, and give you ideas on how you can make the images look better.
Taking The Photo
You’ve prepared the shots, now is the time to start taking photos. Here are a few methods we can recommend making your photos look professional every time.
- Elevated front shots – Use a small step ladder or even the back of a car to get an elevated shot of the front of the house. This creates a better view of the front of the property and captures more in one image.
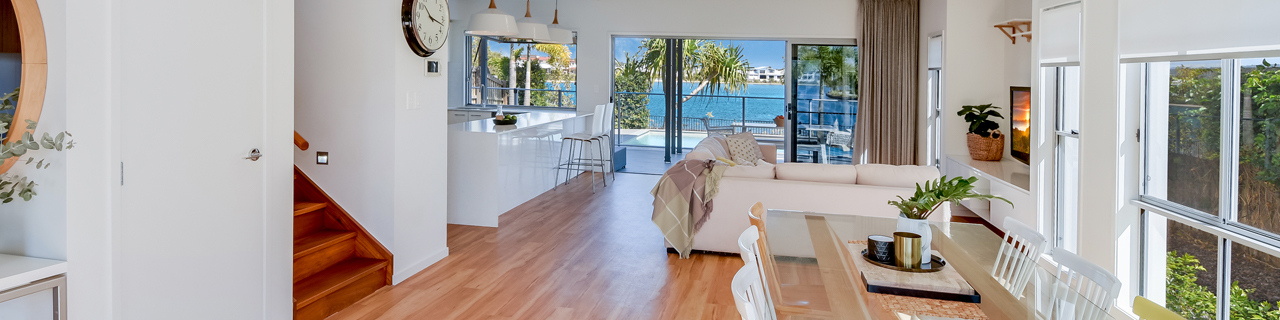
- Framing an interior photo – The best way to frame an interior shot it to align at least two corners of the room, into the corner of the frame. This ensures you show off at least three of the four walls, and gives a great visual representation of the room.
Tip: If you’re having trouble doing this try aligning the corner of a door or window frame. It is also good shooting practice to shoot at eye or shoulder level.
- Shoot no wider than 12mm for interiors on a cropped sensor (16-17mm on a full-frame body) – This creates the most realistic images, any wider and it can make the interiors look larger than they are. If you shoot interiors on 10-11mm, the room look extremely large, which isn’t great for client expectations.
Tips: Lenses always distort vertical lines, but when BoxBrownie.com edits your final images they will straighten your vertical wall lines. It is best to allow some room for possible cropping of your images to happen in the editing process.
- Try different angles and heights – Always test angles and heights when at shoots, take lots of shots so you have a great chance of getting a good one.
- Shoot into corners to create depth, if you shoot directly at walls it will make the photo look flat.
- Low angles are flattering (low straight on into boxy kitchens are popular), so don’t always feel like you need to shoot at eye height.
- Majority of photos should be taken at eye height though.
Tip: If the house has good fixtures, include close-up shots of these in your images. Great ones are quality door handles or kitchen fittings.
- Use a self-timer – This reduces the movement in shots and allows you to step away from the camera if there are mirrors in the room.
Tip: Don’t let Agents/owners walk around the room near you, especially in older houses with wooden floors, as it will shake the camera and create blurry images.
- Shooting a view – With any property photos of a view, it is good practice to have some balcony rail in the photo to show the perspective of an image. This way buyers can easily see it is a view from the property, looking more realistic online.
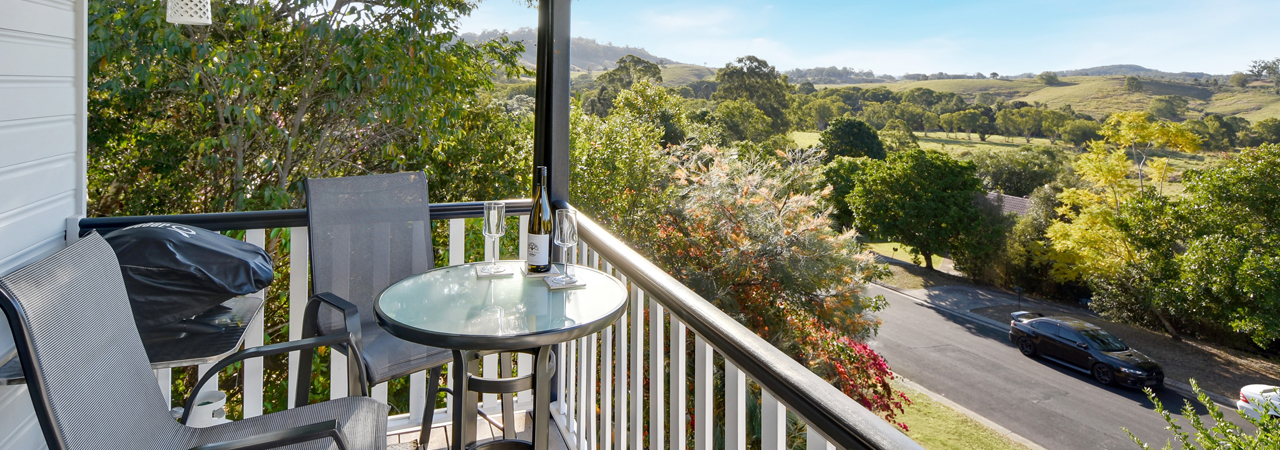
Tip: If you have a tight balcony, only keep a few pieces of furniture on it. Such as just two chairs and a table to show it is a usable space.
- Using flash – You should be using your flash for all internal shots, but you need to be careful when shooting in reflective areas, like bathrooms and kitchens. When shooting bathrooms, it’s best to take the photo on a self-timer, take the flash off and step out of the room, so only your camera set-up is in the reflection. BoxBrownie.com can easily remove the camera from the reflection when editing.
Tip: If the bathroom is tight, it is ok to shoot up to 10-11mm wide (Cropped sensor), so that you can fit all the features in the image.
Tip: Close all surrounding doors and blinds leading into the bathroom. These can create glare on the tiles, closing them reduces camera flare and reflections for a cleaner looking final shot.
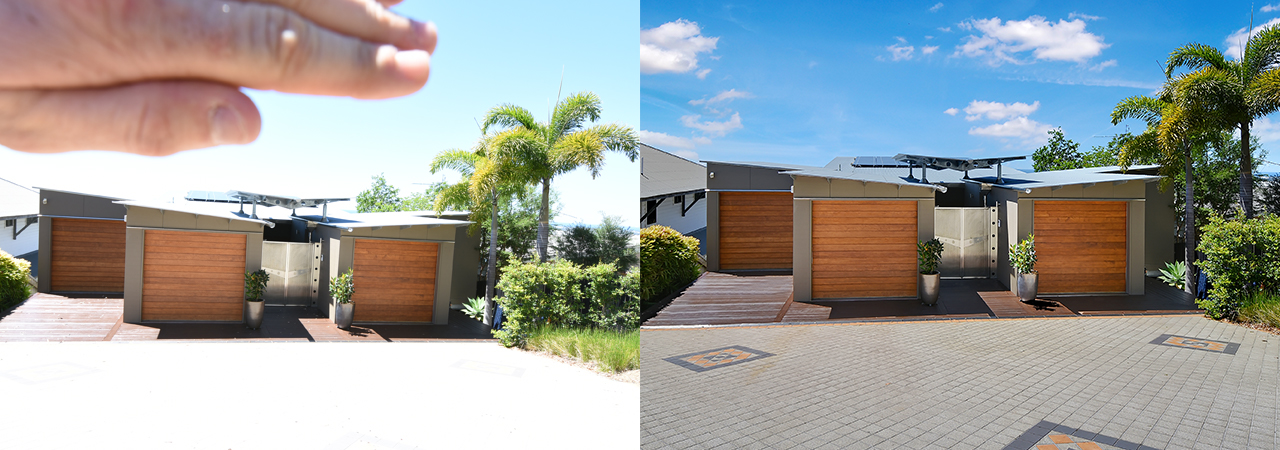
- Facing the sun – If you are facing the sun, block the sun only with your hand when shooting to shade the lens. BoxBrownie.com will digitally remove your hand in the editing process.
Tip: Keep your hand away from tree/foliage areas and any other items in your image, shade the sun and sky only.
- Overcast and rainy days for exteriors– You can still create amazing images in poor weather. Take your photos and BoxBrownie.com can edit in great sky.
- Interiors on
overcast and rainy days – Suburban interiors and properties without views can shoot better on overcast days, due to lack of sunlight and shadows. Overcast days add a softer look to your images.
Tip: If you need to photograph the property in rain, use an umbrella to protect your camera. This reduces the spots on the lens and we can then enhance the colour in the image and brighten the sky.
- Windy conditions – When shooting in windy conditions, only keep your flash on the camera when using it. When on the camera it might catch in the wind and blow over.
Tip: Using your tripod at a slightly lower height will help with stability when it is windy.
- Shoot flat areas of the property – As a rule, most Agents are only interested in usable, flat land of a property, so when taking photos keep this in mind.
- Interior ocean views – If the property has attractive ocean views it is best to take them on sunny days, the better the weather the better the result. Check the weather a few days out. If you can’t get to the property on a good day, we can always edit in a nice sky and enhance the colours. Always let our editors know in the description when uploading your images, that you have a special view that you want them to pay attention to.
- Be aware of subjects in front of your frame – For a more professional look always try and use something to break up the image with items in the foreground of your photo. This can apply for both internal and external shots.
- Special property features – It is always good to get additional features of the property into shoots, buyers love any extra information they can gain about a property. These include things like: Garden sheds, solar panels, water tanks, outdoor kitchens.
- Streetscapes – Make sure you can always see the front door in streetscape photos, it creates a more inviting look to your images.
Essential Property Shots
There are 6 to 12 basic images that are essential for effective real estate marketing. With most people viewing properties briefly online there is only a few seconds to catch their attention, this is why less is more. Sometimes including too much of a property can have a negative impact, therefore you want to only include the images that count.
The main shots of any home are:
- Front exterior
- Rear exterior
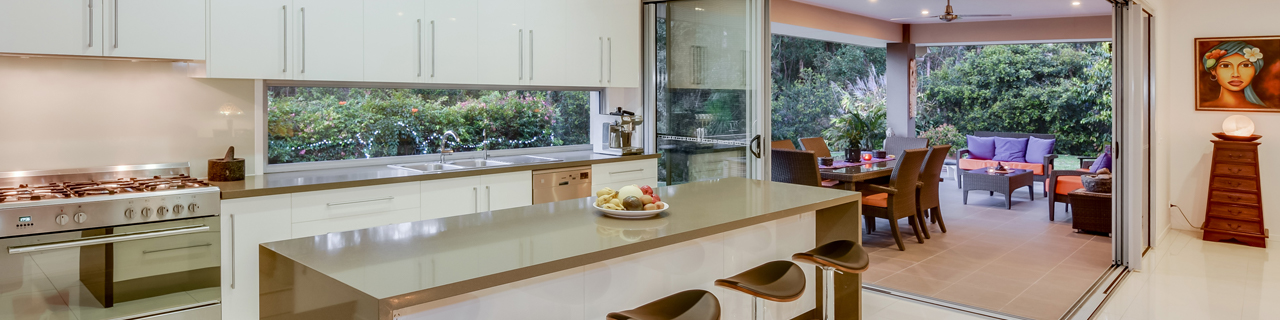
- Kitchen
- Lounge/living area
- Dining room
- Media room
- Largest bathroom
- Master bedroom
- Second bedroom
- Patio
- Balcony or a view
- Pool or spa area
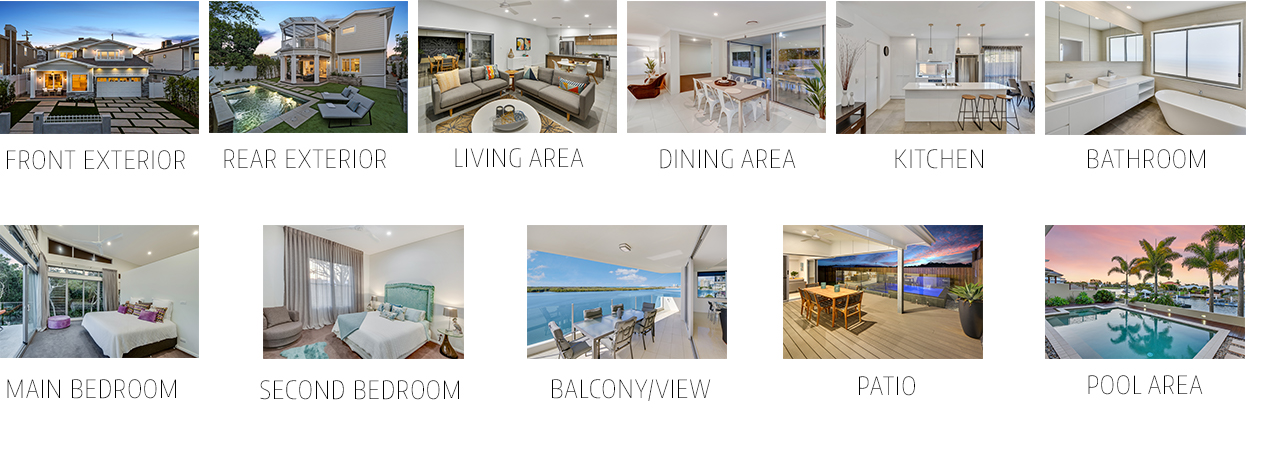
Tip: The best hero shot is usually the rear of the house, shooting over the pool if they have one.
It is always important to remember all the images should tell a story and add value to the property, you want to show off as many features as possible in an appealing way.
Tips for Shooting at Dusk
Having the ability to take great dusk or twilight shots is something that takes a while to master. Dusk shots can make an ordinary home look extraordinary, as it masks any ugly defects. Typically, the hardest time of day to shoot, and the reason why professional photographers charge higher prices for dusk photos.
- When is a good time to get the best exterior dusk shot? – This is generally when the reflection on the windows is even and shadowing from the sun aren’t present. You then have approximately 5 to 15 min of premium light depending on the surrounding environment, weather and clouds etc., to get the angels required.
- For interiors – ensure you don’t have any shadowing in your photos (eg. Sunlight on the wall’s when shooting the inside of the home). The darker the light outside the home, the nicer the interior will look.
Tip: If you live in mountainous or high foliage areas, light can be lost quicker so keep this in mind. Set yourself plenty of time to scout out good angles and shots.
- Allow plenty of time – The perfect dusk lighting comes and goes very quickly, therefore you need to prepare your shot well. Allow yourself 60-90 minutes shooting time before the sunlight drops, enough to shoot the exteriors, make sure you plan your shots well.
Tip: Those new to photography may need 60-120 minutes to shoot a property at dusk to ensure nothing is missed. The light drops very quickly, so it’s critical to plan your shots. LightTrac is a great app to use to track the light to plan your shoots.
- Open blinds and turn on lamps – When you get to a property open blinds and turn on lights in the home. Be mindful of exterior lights as these are normally too bright, so best to keep these turned off. Interior lighting creates a nice glow when considering the property from the outside.
Tip: Be careful at old properties as sometimes turning on all the lighting can overload the power. It is best to only turn on lights near the windows, this still creates a nice external glow. If it doesn’t look great in the final shots, we can always photoshop better lighting in the editing process.
- Don’t light fireplaces – The smoke will ruin any of your external shots. If you want the fire ambiance for your internal photos, BoxBrownie.com will digitally enhance the flames for you as part of our Image Enhancement edit.
- Keep an eye on which side the sun sets – Shoot the opposite side to which the sun sets, as this will be where is gets darkest the quickest.
- Flash is your friend – It can be hard to auto focus during dusk shots on darker homes. External flash helps with the focus, it is good practice to always shoot exterior dusk shots with the flash on to ensure focus is at its best in low light scenarios.
Tip: If you’re running out of time to take your shots, it’s best to switch shooting modes to manual “M” and take 2-3 brackets instead of 5.
- Set aperture between F7.1 and F11 – This will keep the shots fast, plus lenses are usually sharpest around the mid-point of their aperture range.
- Set ISO to 100 – This creates the clearest possible results (less noise and better colour in the image)
- Shoot in manual mode – Using bracketing is best, but it tends to take longer. Just bracket 2 to 3 photos instead of waiting for the normal five.
- Shoot when shadows are even – This is when the dusk photos will look the most appealing as there will be less shadows and less dark contrasts.
Tip: Make sure you have plenty of practise shooting in “M” Manual mode. Use 2 – 5 HDR brackets to shoot exteriors.
- Master your lighting technique under a controlled environment – It is also a good idea to practice your dusk photography method during the day, so you can master your lighting under a more controlled environment. Sometimes only 1-2 images are all that is required to make the edited shot work, but always gathering as much photo information as possible is the best.
Do a range of shots from 1 second, 5 to 10 seconds and 20 to 30 seconds long. Make sure you have a darker image getting all the interior lighting information, then 1 or 2 longer lighter exposures containing all the foliage and exterior photo information.
Tip: Daytime photo ranges usually require more photo information than a dusk shot. You need to be able to clearly see the detail in each HDR shots, so our editing team has enough visual information to make them look amazing.
Wrapping Up
It is important to review the property one last time before leaving the property, just to double check if you have missed any angles.
Unfinished areas of the home – If clients are worried about unfinished areas of the home, let them know that BoxBrownie.com can edit photos to include nearly anything they want. (Eg. The lawn half way through being laid? BoxBrownie.com can photoshop finished grass in)
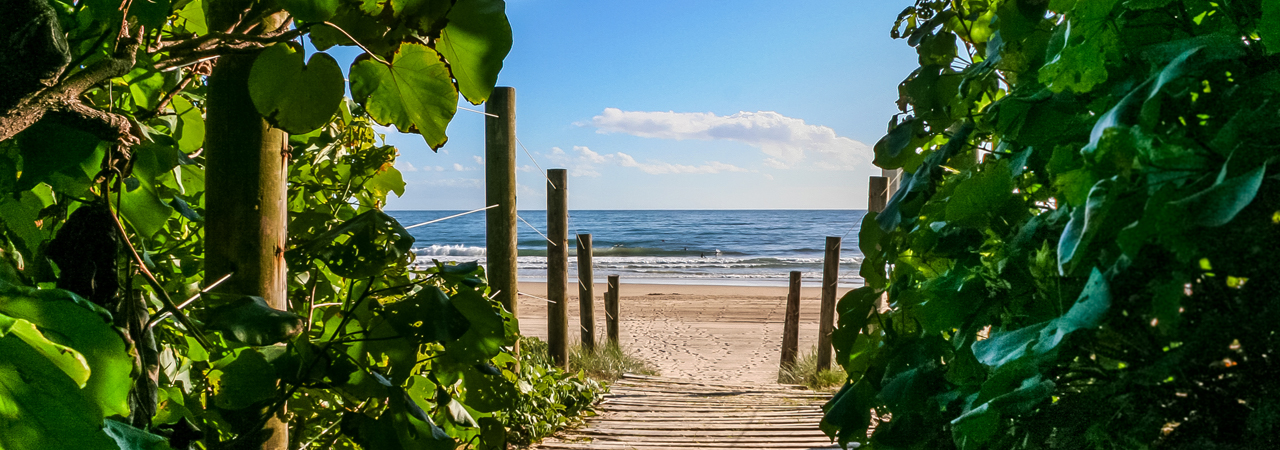
Lifestyle shots – Photos of local attractions in the area are always good for property marketing, and are popular with Agents. Any key attraction near the property is worth including: Beaches, sporting fields, local should.
Reviewing the photos onsite – Showing the Agent/client the photos during the shoot builds rapport with them, they might also have some other good angles in mind. It is always good to check that they are happy with the photos you have taken, as it will save you from having to re-do the shoot.
Tip: Walk around the property a different way then you did before. Sometimes seeing things at a different angle can make the difference to the feel of your shots.
Once You’re Home
A photographer’s job doesn’t finish at the property, the process of storing and sorting through images involves the most time and care. Following these steps will ensure you don’t lose images and are organised with all the photos you have on file.
- Always backup your images – The first thing to do when you get home is to back up your images on a hard drive. Create a new folder for each address you photograph, so that houses don’t get mixed up. No matter how good or bad your images are keep all of them! From this folder select the best ones that you will send to BoxBrownie.com for editing.
- Upload your images for editing straight away – While the property is fresh in your mind, this is the best time to upload the images to BoxBrownie.com for editing. This will also reduce the delay in getting your images to the client, as the final edited version will be sent back within 24 hours.
- Refresh your memory card – Once you have backed-up all your images on a hard-drive, it is best to delete them from your memory card, this will help protect the card. Formatting the memory card is always useful as it removes all traces of the images and leaves more space.
Tip: Formatting help clear the memory card completely. Erasing images just tells your camera that it is ok to write over the images already on your card, so not actually remove anything. By formatting, you actually remove the images before taking new ones, so you start off with a fresh data free card.
Taking onsite photos is only part of the process, the rest is involved in the editing of the photograph… which is where the magic happens.
If you’re ready to start taking photos, why not check out some of our other great photography tip blogs:
- Brad’s Pre-Photography Check List
- Real Estate Photography Tips for the Untrained Eye
- How To Get Perfect Shots on Sunny Days
- Can I have a Rain Check? Real Estate Photography in the Rain
- How to make a room look larger with real estate photography