5 TIPS FOR REAL ESTATE PHOTOGRAPHY
Using quality photos in your real estate listing is essential when selling a property. Better photos generate more interest which potentially equates to more dollars. This article covers 5 essential tips that make shooting and selling a home easier.
1) Remove clutter if the property is occupied
If someone is still living in the property, you need to make it look like a display home as much as possible. Removing items from the shot can be the difference between an image that sells as oppose to one that doesn’t. Quick tips when moving clutter out of a shot include:
• Tucking away TV remotes and newspapers
• Removing blankets or clothing from chairs and sofas
• Putting away personal items like picture frames and trinkets
• Removing any unnecessary items from bench spaces, tables including toasters, kettles, and appliances in kitchens where possible
• Removing anything that doesn’t need to be there or have no purpose in the room.
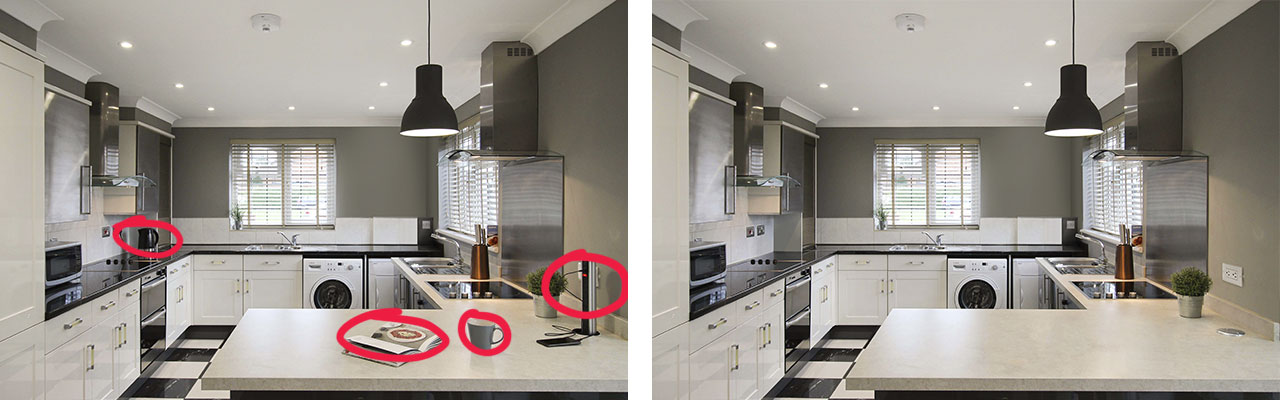
IMAGE 1 – Before and after… Make sure to remove clutter from the shot.
2) Create symmetry in the shot
You can completely change the space of a room by ensuring everything
is symmetrical. To create a shot that is inviting, make sure to:
• Centre items like fruit bowls to the middle of table & bench tops
• Move furniture away from walls to create an inviting and accessible space
• Straighten cushions, bed covers and pillows
• Align bench stools, dining chairs and outdoor lounges
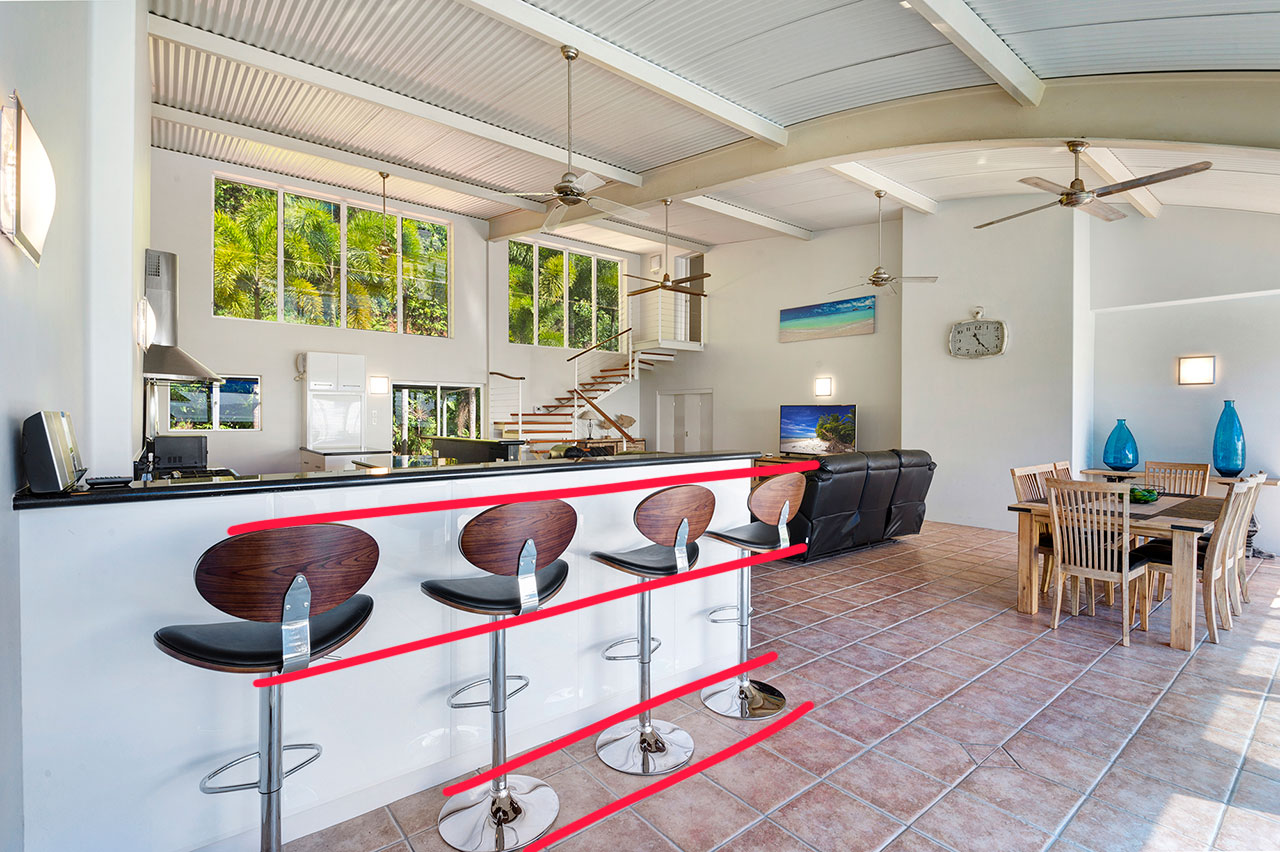
IMAGE 2 – Ensure bench stools and other bits of furniture are aligned to create symmetry and space
3) How to find the best angle for the perfect shot
Every room is unique which can make it challenging to get the perfect shot. Kitchens and bathrooms for example can have tricky corners, odd shapes and reflective surfaces. When trying to find the best angle to shoot from, ensure that:
• The camera is horizontally level, this is the way the human eye sees things
• Experiment with different heights, either waist & eye height or over head for longer areas
• Shoot from a doorway or part of the room that reveals as many key features as possible
• Try and get 3 corners of the room with one near the centre, on the far right and other far left.
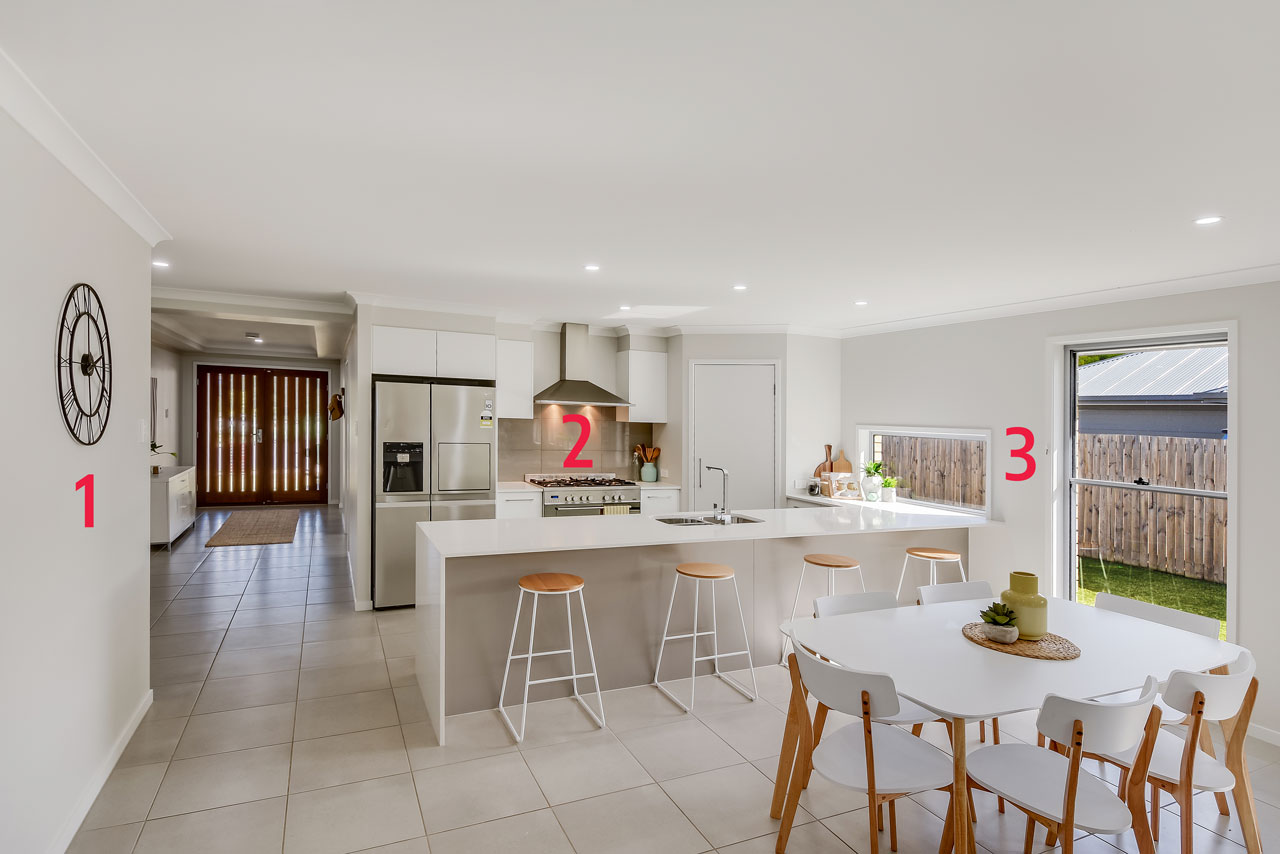
IMAGE 3 – A room will always look more open if you capture 3 corners in the shot
4) Include pictures of nearby amenities and attractions
Experienced agents often use storytelling to help sell a home.
Including photos of nearby amenities and attractions show the buyer what type of lifestyle is on offer. For example, if the beach is only 10 minutes away, head out there and take a shot or 2. Other areas to consider are:
• Shopping centres, convenience stores and cafes
• Walking tracks, parks and recreational areas
• Lakes, mountain and scenic areas
• Family friendly locations and
• Local tourist destinations and attractions

IMAGE 4 – Take a few shots of nearby amenities and attractions to include in your listing
5) Use lighting to your advantage
Light is the most important part of photography, but it also sells homes. Making rooms bright and airy will completely change the look and feel of an image. This can be hard in low light conditions so always:
• Try and take your photos mid-morning or afternoon when light is abundant
• Turn all room lights on, even bedside and floor lamps
• Open all curtains, drapes, shutters and external doors
• Always use a flash with diffuser to give an even light throughout the room
These 5 tips can be applied to any home, anywhere and will dramatically improve your images and more importantly, increase the number of potential buyers to your listing every time.