NEW YEAR’S RESOLUTION: DON’T MAKE THESE PROPERTY PHOTOGRAPHY MISTAKES
As we begin a new year, many people make resolutions to improve their lives by learning a skill, picking up a healthy habit or starting a new routine.
For your New Year’s resolutions, consider hitting refresh on your property photography skills, to ensure you aren’t letting common mistakes hinder your listings.
To help you focus on success in 2024, here are some frequent real estate photo blunders and how to fix them, so that your photos are click-worthy every time.
Common Real Estate Photography Mistakes and How to Fix Them
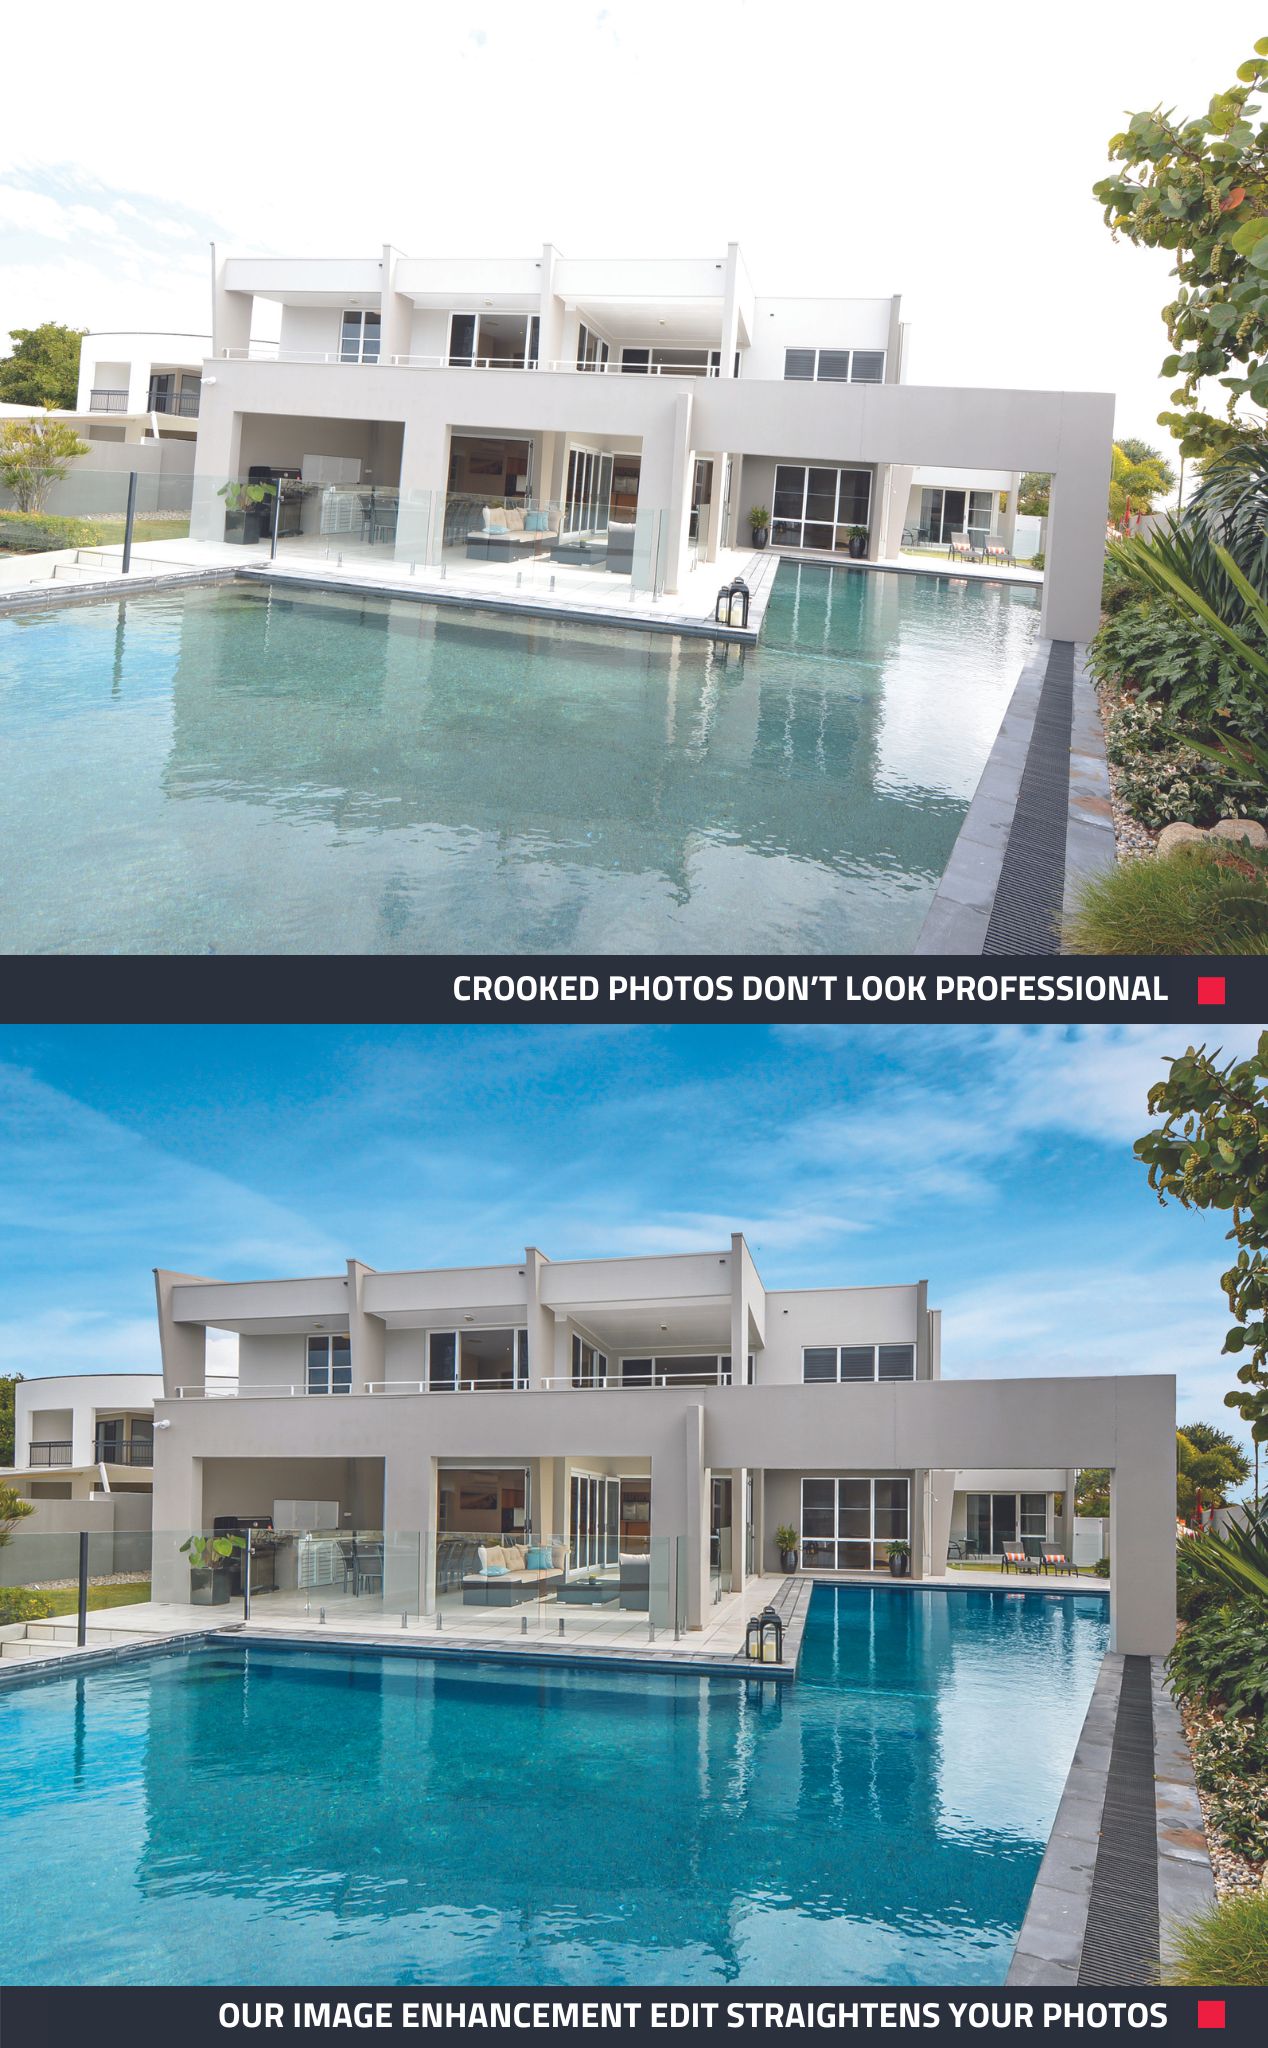
Crooked Horizons and Lens Distortion
Crooked horizons and lens distortion can significantly impact the quality and perception of property photos. Crooked horizons can make the image look off-kilter and unprofessional, while lens distortion causes rooms to look bigger or smaller than they actually are, leading to the actual size of the property being misrepresented.
To avoid a crooked photo, use a tripod and make sure the camera is level before taking the shot. Lens distortion can be minimized by correcting your camera settings and avoiding tilting it up or down excessively.
Insider tip: Both crooked horizons and lens distortion can be corrected with our Image Enhancement edit, where our team of expert editors adjust 17 individual elements of the image to make them as eye-catching as possible.
Poor Lighting
One of the most common mistakes in real estate photography is poor lighting. To fix this, turn on all the lights in a property and try shooting during the late afternoon for a warm, golden glow.
As much as possible, try to avoid shooting during the middle of the day when the sun is directly overhead, as this can cause harsh shadows and overexposed areas.
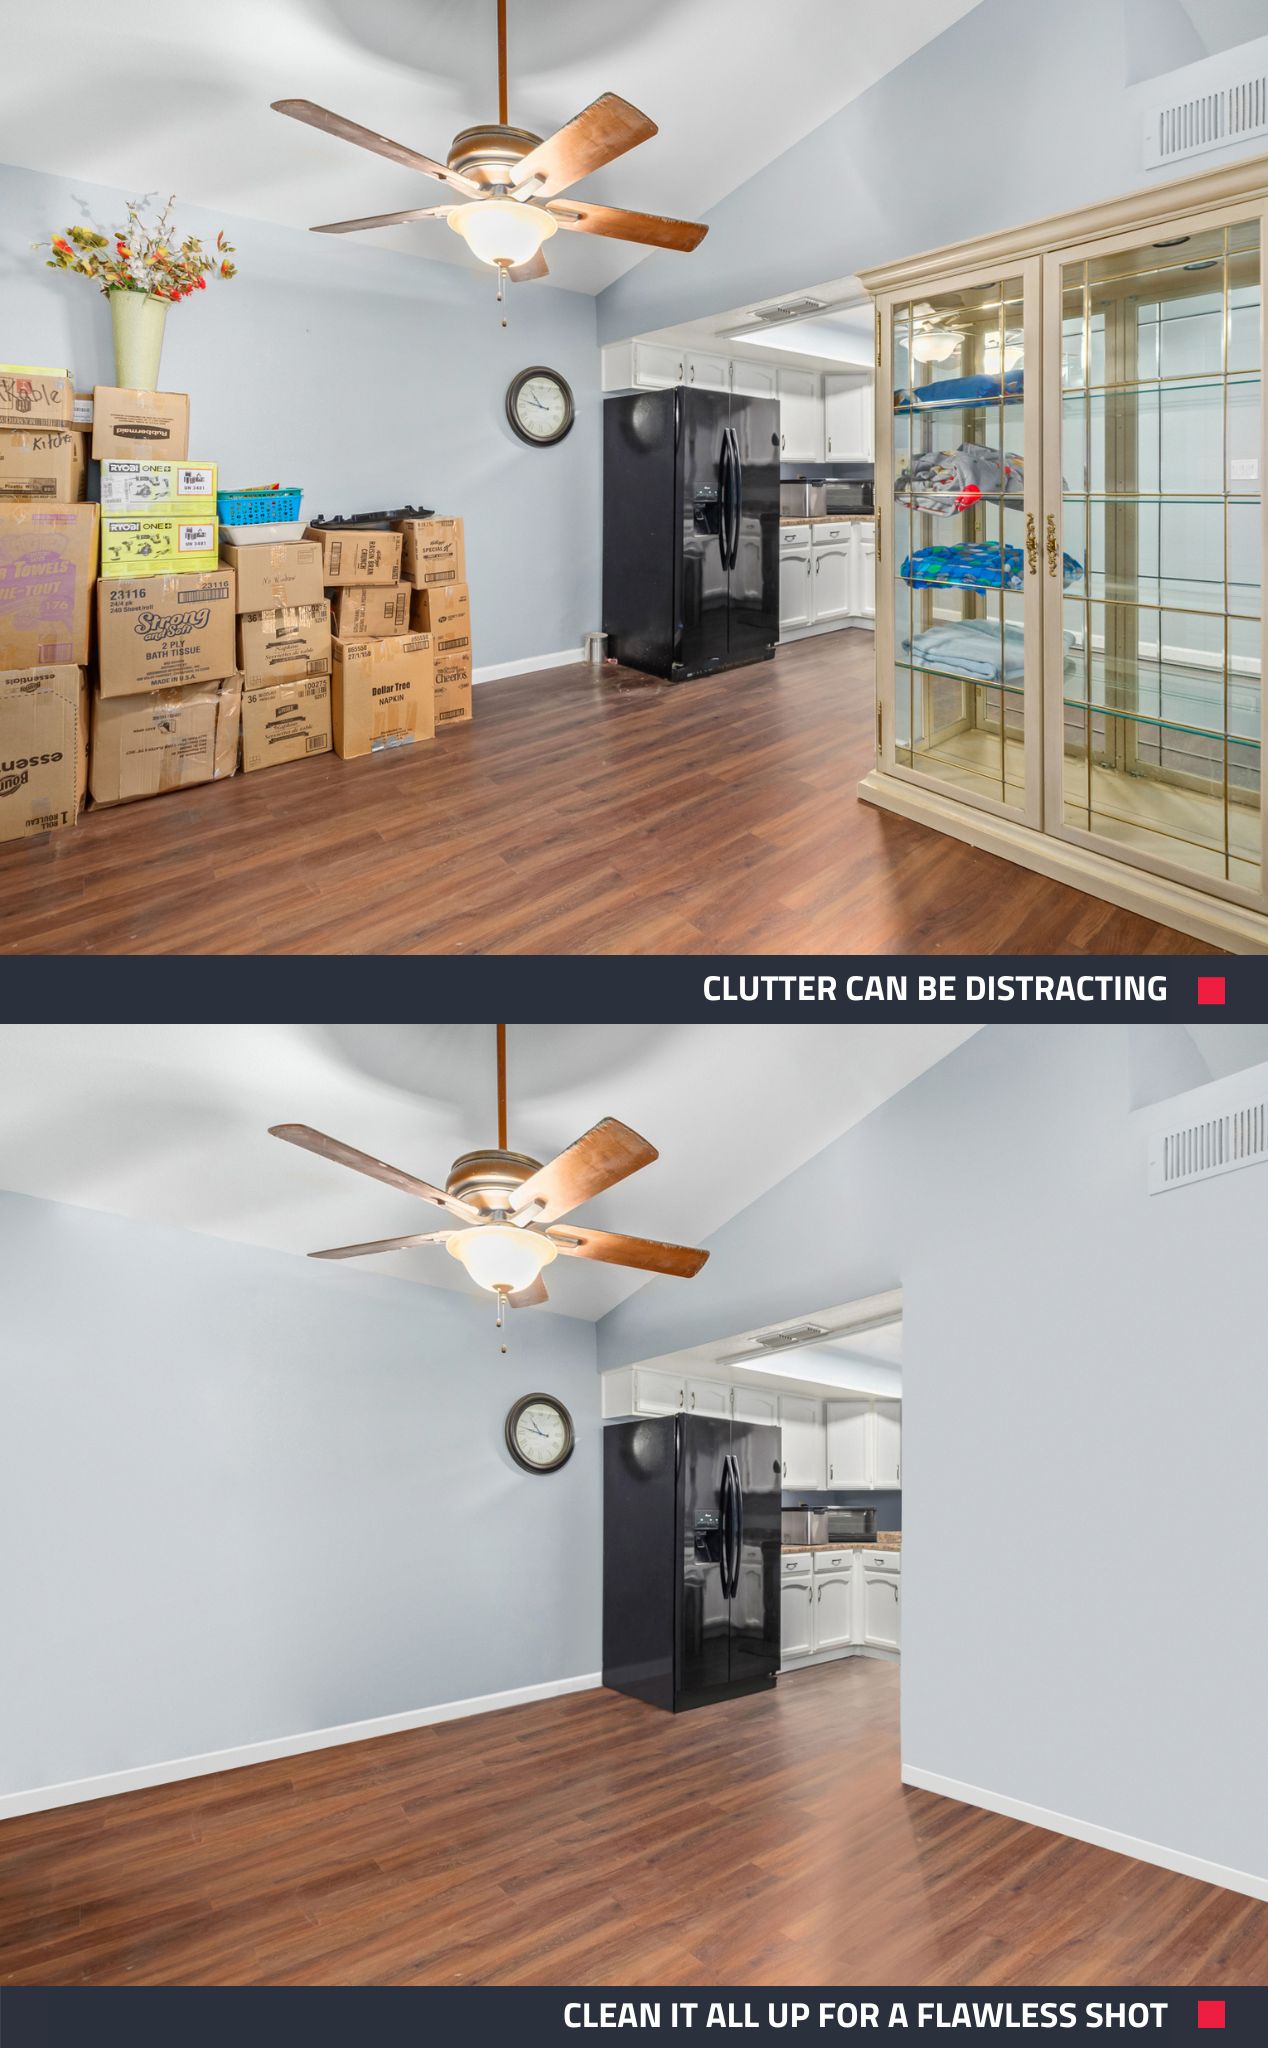
Cluttered Spaces
Clutter can be distracting to the overall shot and make the space look smaller than it actually is.
Make sure you declutter the space as much as possible and remove any unnecessary items before taking a photo. This will prevent anything from detracting attention away from the property itself.
Insider tip: If you forgot to remove an object from the shot or just didn’t have time, we’ll clean, de-clutter, and de-personalize the photo for you with our Item Removal edit.
Poor Composition
Poorly composed photos aren’t eye-catching and can look unbalanced and unpolished. To fix this, use a photography technique called the ‘Rule of Thirds’.
The ‘Rule of Thirds’ involves imagining the shot being divided into a grid of nine equal parts. Aim the camera so key elements are placed where the grid lines intersect to create a compelling and well-composed shot. This also helps highlight these elements, as the eye is naturally drawn to these areas of an image.
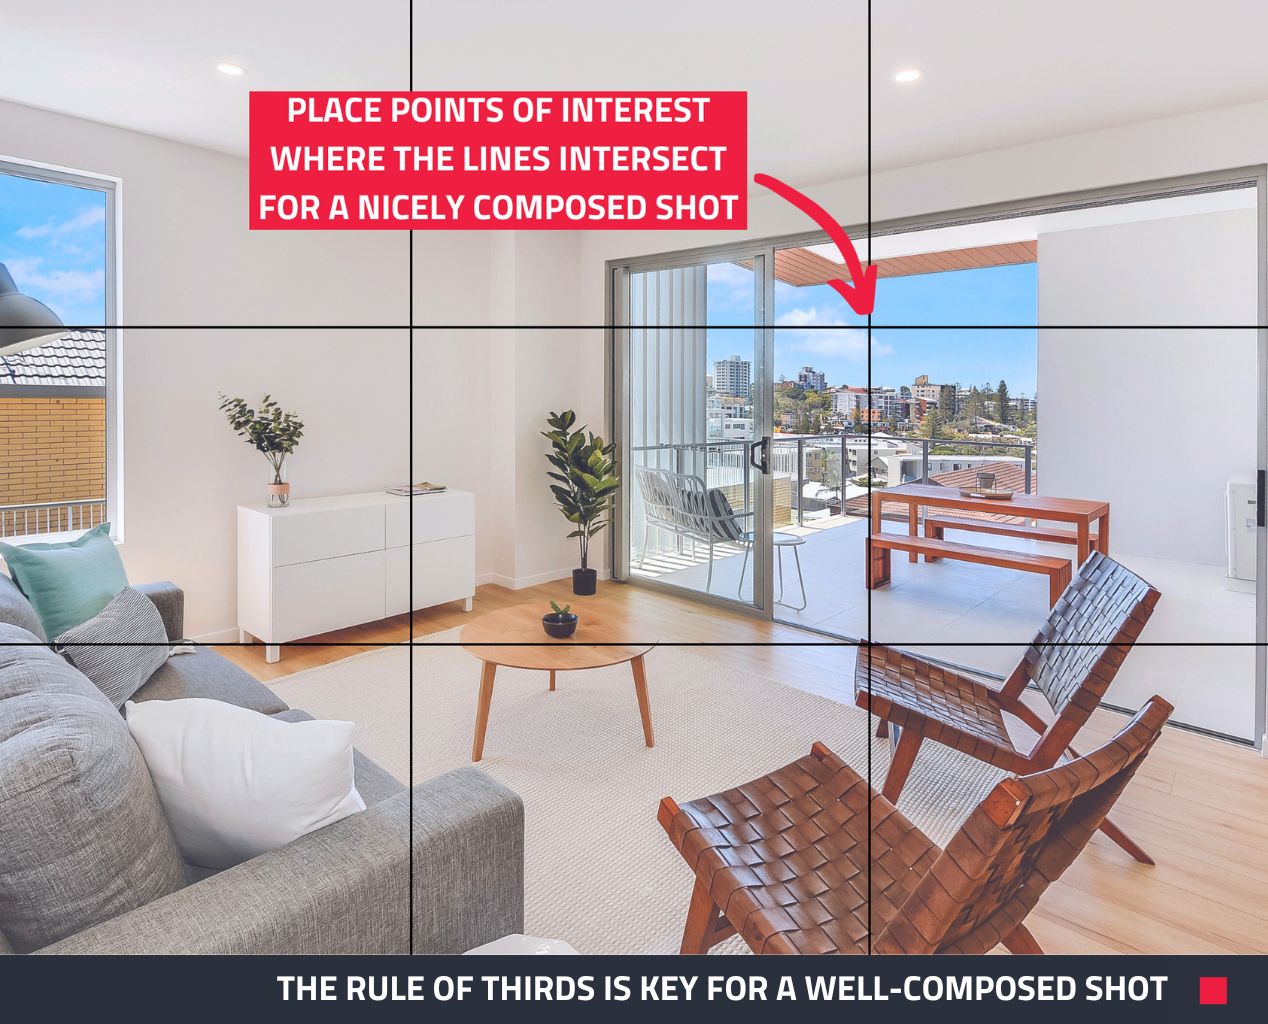 |
| Make sure you aim the camera so points of interest, such as a beautiful view or architectural feature, are placed where the grid lines intersect. |
Over-Editing
There’s a fine line between enhancing a photo so it accurately represents what the eye sees in real life and over-editing it to the point that it looks unrealistic and unappealing.
It’s best practice to outsource your editing to editors who have experience with transforming real estate photos into captivating, professional images.
Not Staging the Property
No matter how beautifully edited or well-composed, photos of an empty property can leave the viewer underwhelmed. To make them more appealing to buyers, virtually stage the images with stylish furniture and décor that complement the space and show off the property’s potential.
![]()
Snap to it! By avoiding these common mistakes and following these tips, you’ll be well on your way to achieving your New Year’s resolution of having click-worthy photos every time you list a property.
Want to give one of the edits mentioned in this blog a try? Sign up for free to BoxBrownie.com and receive 4 complimentary photo edits! No credit card needed.
RELATED ARTICLES
Want to learn how to shoot real estate like a pro? What about learning how to shoot a property in under 7 minutes? In this article, world class real estate photographer Brad Filliponi shares some of his tips on how to help shoot and sell property faster!
READ MORE
Shooting a property from start to finish can seem like a bridge too far for many people but it doesn’t have to be that way. In this blog, we walk you through the entire process and highlight some simple tips and tricks to make capturing professional-quality images quick and easy.
READ MORE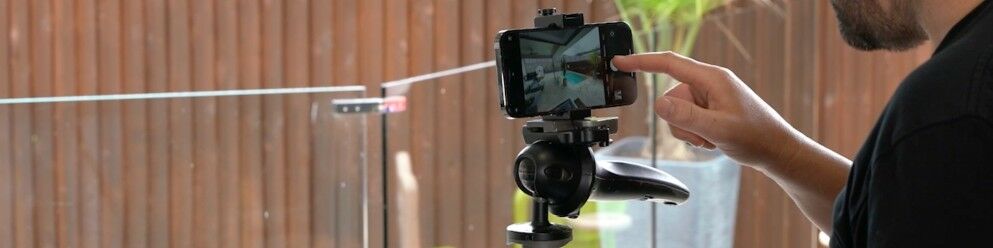
Worth the upgrade? If you shoot your own listing photos and are thinking about an iPhone upgrade, see how the cameras on the two models measure up while we demonstrate how you can get top-quality imagery for your property listings.
READ MORE
Winter, spring, summer, fall – this edit has it all! Our Season Change edit is back, now part of our Virtual Renovation service. Digitally swap seasons in your property photos to boost curb appeal, keep listings fresh and more. See how your listings can shine in any season!
READ MORE
Here is the BoxBrownie.com guide to 360° photography including camera and equipment recommendations. Read on for how to get started, and easily become a 360° photography guru.
READ MORE
If you have a listing that has been lingering on the market, it may be time to hit refresh and use these top tips to rent a property fast and reduce the time between vacancies.
READ MORE