SIMPLE TIPS FOR TAKING YOUR OWN REAL ESTATE PHOTOS
Getting your marketing right is vital for successful real estate sales, and the starting point is with professional images. With most buyers browsing the internet for properties before they attend a viewing, it makes having quality photos even more important. Essentially, it is your first chance to make a good impression.
Professional looking photos are essential for any type of property, from
- Attracts more buyers
- Increase inquiries
- Increased clicks on online listings
- Secure a higher selling price.
It doesn’t matter if you are a beginner or seasoned real estate photography professional, these are the basic tips that need to be applied when taking all real estate photos.
Having The Right Equipment
Starting out with quality equipment is the first step to gaining great real estate photos. You don’t need to go crazy buying the latest and greatest gadgets, but you do need a few basics.
Camera
Unfortunately, great real estate photos don’t come from using a Smart Phone, to get professional looking photos you need a quality camera. As a starting point the Canon M3 Compact Camera with a 15-45mm wide angle lens, as it is affordable and easy to use.
Here are some great tips on camera and lens packages, for beginners to professional photographers.
Using The Correct Lens
There are a variety of lenses available and they all have their place, depending on the kind of photographs you’re taking. Real estate photography is about keeping the images wide but realistic and at the same time capturing as much information as possible. Never use a fish-eye lens or ones that are too wide, they will bend lines and distort rooms.
For real estate photography, we recommend using a wide-angle lens. When purchasing a lens for your camera you will need to know if the camera is a full-frame body or cropped sensor body as this will affect the type of lens you purchase. If you have a full-body camera you will need to use a 16 to 17mm lens, for cropped sensor use a 12 to 15mm lens.
Here are some guides on the lens and camera sets you should consider getting.
Tripod
Real estate photography is about precision and clear details, the only way to ensure you get this is by using a tripod. A tripod should be used in all your property photos, reducing the chance of blurred lines or an uneven shot. It also allows you to use the camera’s timer when shooting bathrooms, so you don’t get caught in reflections.
Tripods are also important when using the HDR bracketing photography technique. This is where a photographer takes a photo of the same scene with multiple exposures, then blends the image together to create one well exposed and detailed photo. It requires the camera to be very still, to reduce the chance of a blurring occurring in the image.
Flash
Although most cameras come with a built-in flash, they generally don’t cut it for real estate photography.
Using an external flash is still important, and it is best to use an external sync flash for capturing all the details in an image. A Flash also needs to be applied when using the HDR bracketing photography technique, often used by professional photographers.
Here are some great tips for using a flash and getting your camera settings right.
Setting The Scene
All great real estate photos are carefully staged and planned. Good photographers carefully prepare a scene before taking a photo, because they know these small differences can have a huge effect on the final outcome.
If a house already has furniture in it, here are a few small things you can do to prepare a room:
- Remove clutter, like paperwork, clothes or any items unnecessary for the photo. Try and make the property look like a display home.
- Try and reduce the number of personal and religious items visible in a photo. Things like family photos, kid’s toys, bins, and magnets on the fridge.
- Straighten furniture and linen. Creating clean lines can do wonders for a room.
- Shift furniture to frame an image better or make it appear larger.
- Open all the blinds and turn on lights. You want as much light in rooms as possible to be able to get the best pictures.
There are many more tricks you can use for getting the best shots, a great reference is this Pre-Photography Checklist. You can even provide this checklist to tenants or homeowners, so they can get the property ready for when you arrive to take the photos.
Capturing The Scene
Once you have walked through the property, set up the rooms and pick the angles for your shots, it is now time to take your photos. Professional photographers all have set shots they use and know angles that will work, they gain this from years of experience.
To help you here are a few basic tips for getting photos just right.
Interiors
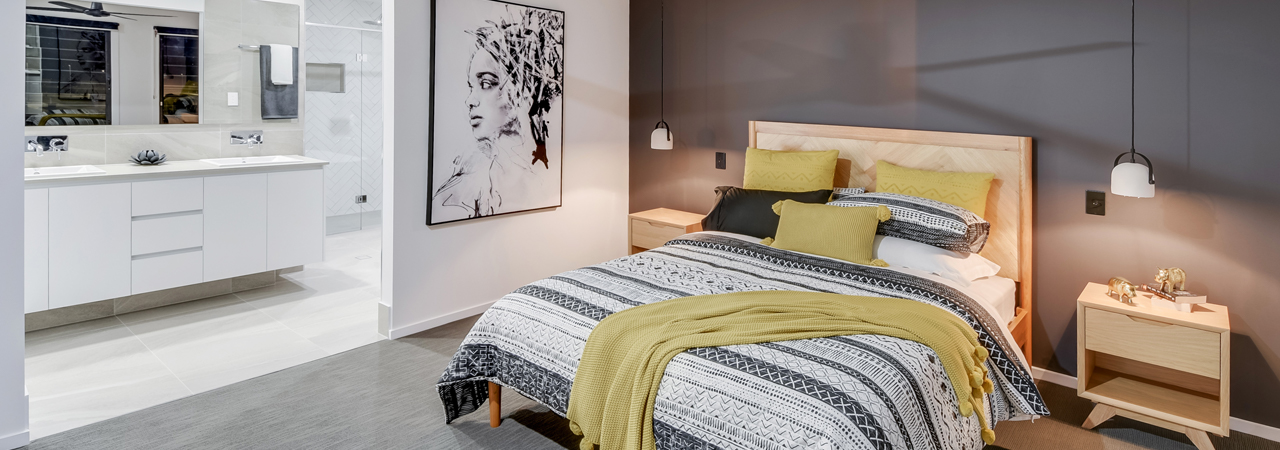
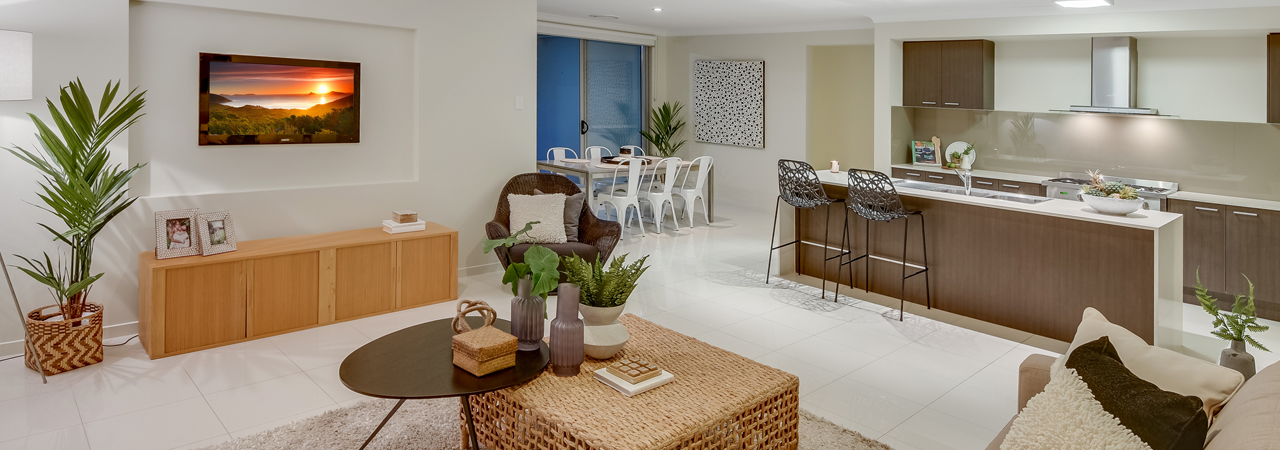
The important part of interior real estate photography is being able to capture the whole room in one photo and present it in a realistic and appealing way. Here are a few things you need to do to get the best internal photos of a property.
- Align two corners of the room. Stand in one corner of a room, so you can capture the other three will enable you to get the widest perspective. If you’re having trouble doing this, try and align the cover of a door or window frame.
- Use different heights depending on the room. It is best to choose the height on which to shoot a room based on its contents. Kitchens are best to shoot at chest height due to the number of cupboards and benches. 99% of shows should be shot at eye level, this is how buyers will walk through the property and the photos will match their sight in real life. Ideally, you want to create an image which shows everything in the room, in the most appealing way.
- Show off nice fixtures. If a bathroom or kitchen has great fittings make sure these are captured in your image.
- Open all doors. Always open doors in a home to create a larger feel and display the flow of the property. Opening doors that open onto an outside living area will give the feeling of space. Opening doors
creates depth in shots.
The main goal is to keep images neat, clear and capturing the feel of a property, and there are a variety of ways to do this. Here are some additional on-site real estate photography hacks that you can use.
Exteriors
Taking exterior photos of a house tends to be a bit more complicated, this is because there are so many different elements to consider. If you plan it right and have an idea of what photos you want, you can easily achieve the shots you need. Here are some factors to consider when taking external photos of a property.
- Avoid the middle of the day. This is the time when shadows are the darkest and overhead. With external photos, you want to avoid having too much shadow. If you can’t avoid the midday sun, here are a few tips for getting the best photos.
- Get a higher elevation of the front of the house. This creates a better perspective and captures more of the property.
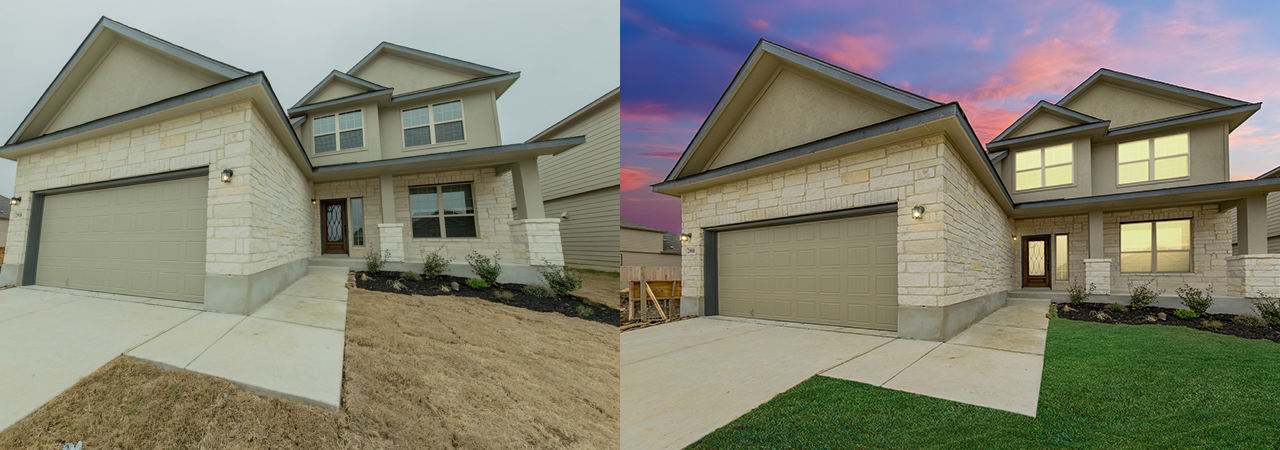
- Overcast days are great for external shots. As it reduces the shadow in the image. You can always use post-shoot editing to photoshop a more appealing sky in. Day to Dusk editing works best on overcast days for the most realistic results.
- Turn on all lights. If possible turn on all internal and external lights (except spotlights)
Real estate photography is all about capturing the best, most marketable aspects of a property. Therefore, it is important to only get the shots that count, and there is generally a set group of photos which show this.

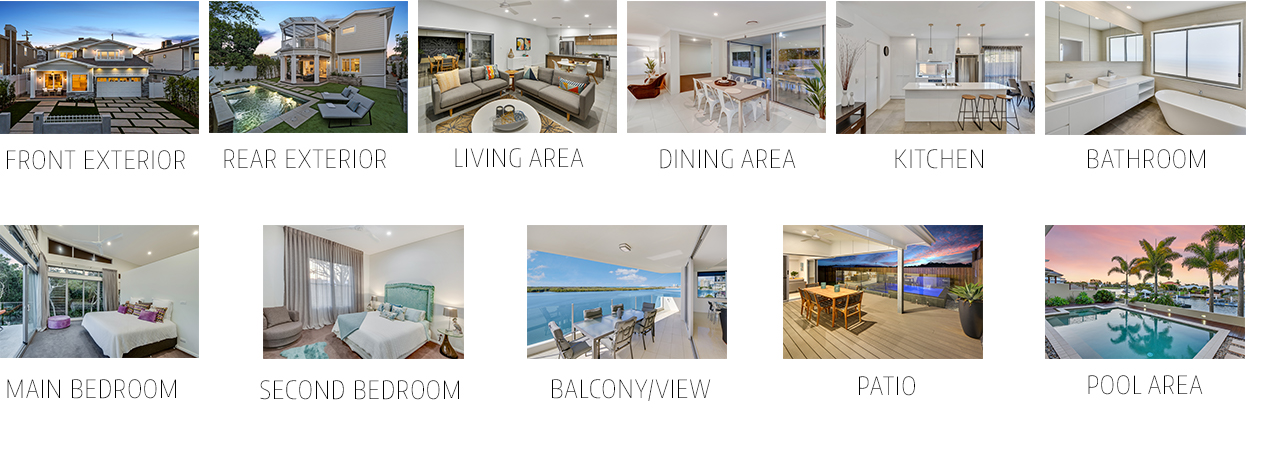
In addition to carefully considering the above factors when taking your external and internal shots, here
- Front and rear exterior
- Kitchen
- Living and dining area
- Largest bathroom
- Master bedroom
- Second bedroom
- Patio
- Balcony or view (if the property has one)
- Pool or spa area (if the property has one)
It is important to remember that all the images should tell a story and add value to the property, you want to show off as many features as possible in the most appealing way.
Once The Photos Are Taken
So, you have your final photos, maybe some of them didn’t turn out as expected? The sky is grey, the grass is dead or the lighting in a room isn’t appealing, there is a quick and easy solution for fixing this and it is used by all professional photographers… post-production image enhancement services.
Nowadays professional photographers outsource their editing, as it is time-consuming and difficult. The one edit they apply to all their images is basic Image enhancement which is used to sharpen, correct color and straighten images, which is particularly important in real estate photography. Although basic image enhancement is used on nearly all real estate photos, there is a huge range of photo editing options available to agents. Here are some of the affordable and easy image edits that you can include in your photos.
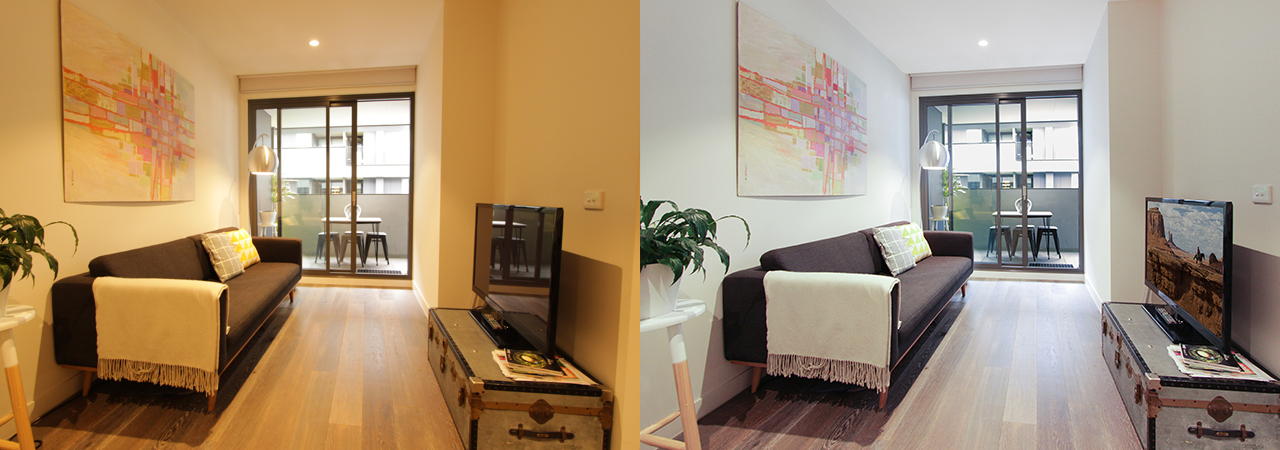
Image Enhancement
This is the basic edit required for all real estate photos, from internal to external shots. Image editors will generally apply a few basic enhancements to images such as adding fire to fireplaces, white balancing, lawn enhancement and outdoor blue-sky replacement just to name a few. As a rule, image enhancement should be applied to all images used for marketing a property.
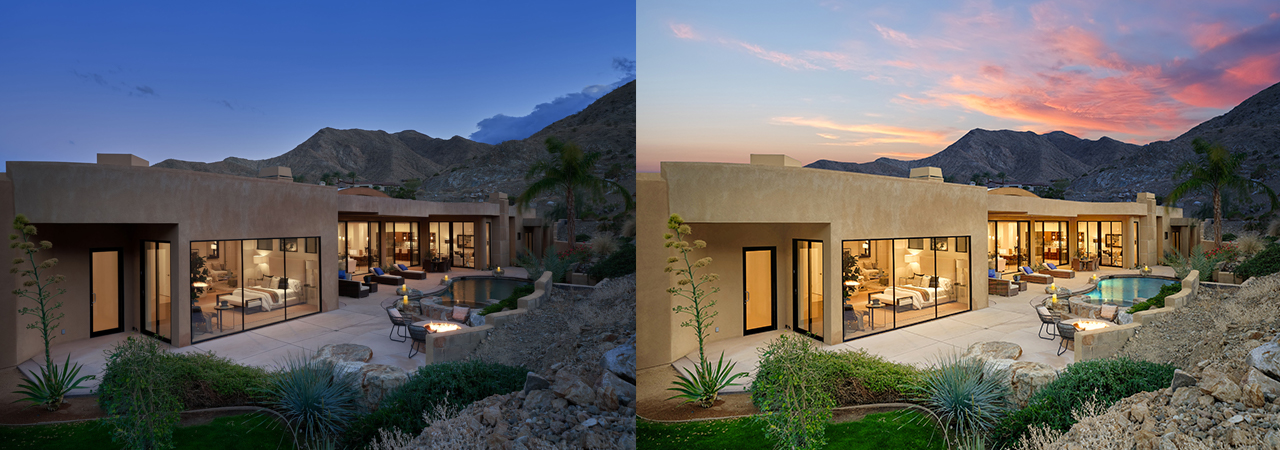
Day to Dusk Conversion
Amazing sunsets don’t happen often, so capturing them can be difficult. Photographers save the hassle of waiting around for the perfect sunset by editing it in. Most reputable photo editing services provide this option, which can be applied to any daytime external photos. Dusk shots are proven to make a property look more attractive and proven to gain four times more online views.
Item Removal
Often it isn’t until after we sit down and review our images that we notice it looks a little cluttered, or something shouldn’t be in it. Removing items from images is one of the easiest ways of tidying up a picture, without having to shoot it again. Image editors can remove nearly anything from a picture and make it appear as if it was never there.

Virtual Staging
Sometimes traditional staging isn’t an option for an empty listing due to the price or the time it will take, this is where the recent developments in Virtual Staging have now made it a great option. Virtual Staging can be used to build realistic furniture into an image, to help show buyers what the home would look like if it had furniture. It is also a great option to make a dated property look more appealing.

Getting more from your real estate photos...
If you’re in search of more information and ways of boosting your real estate sales via professional photos visit the BoxBrownie.com blog.