HOW TO SHOOT BEDROOMS
Introduction
Trying to achieve some great images of a bedroom for your next listing? Brad Filliponi, our co-founder and experienced real estate photographer has you covered. In this blog, he is going to share his secret top tips on how to take ideal shots of bedrooms.
Include the door into the bedroom in your image.
This will give your potential buyer a really good understanding of the layout of the room.

Take a step back and take your photo from bedroom entry.
By showing as much of the room as possible, you can see how much space there is. However, it's a fine balance between showing the whole space in one frame, and not making the room larger than it actually is.

Remove any unnecessary items from the room.
In this particular image below, you can see there is a rubbish bin and a black book on the bedside table that could have been removed before the photo was taken.

Avoid cropping any furniture out of the bedroom.
By the bed being cropped in the below image, it doesn't represent the true size of the room.

Capture any adjoining rooms in the one image.
Some bedrooms have a walk in wardrobes or ensuite. that are great to include when shooting the bedroom. Showing two areas off in the one photo can also save if you have a low budget or there is a restricted amount of photos you can have taken.

Align window furnishings with the exterior.
By pulling down the blind in this image to meet the top of the fence, it ensures the focus is on the property itself and not on any neighboring homes.

Check all the details.
The power board and the bedding hanging out underneath the bed can be quite distracting. This can easily be fixed or removed in the pre photography phase.

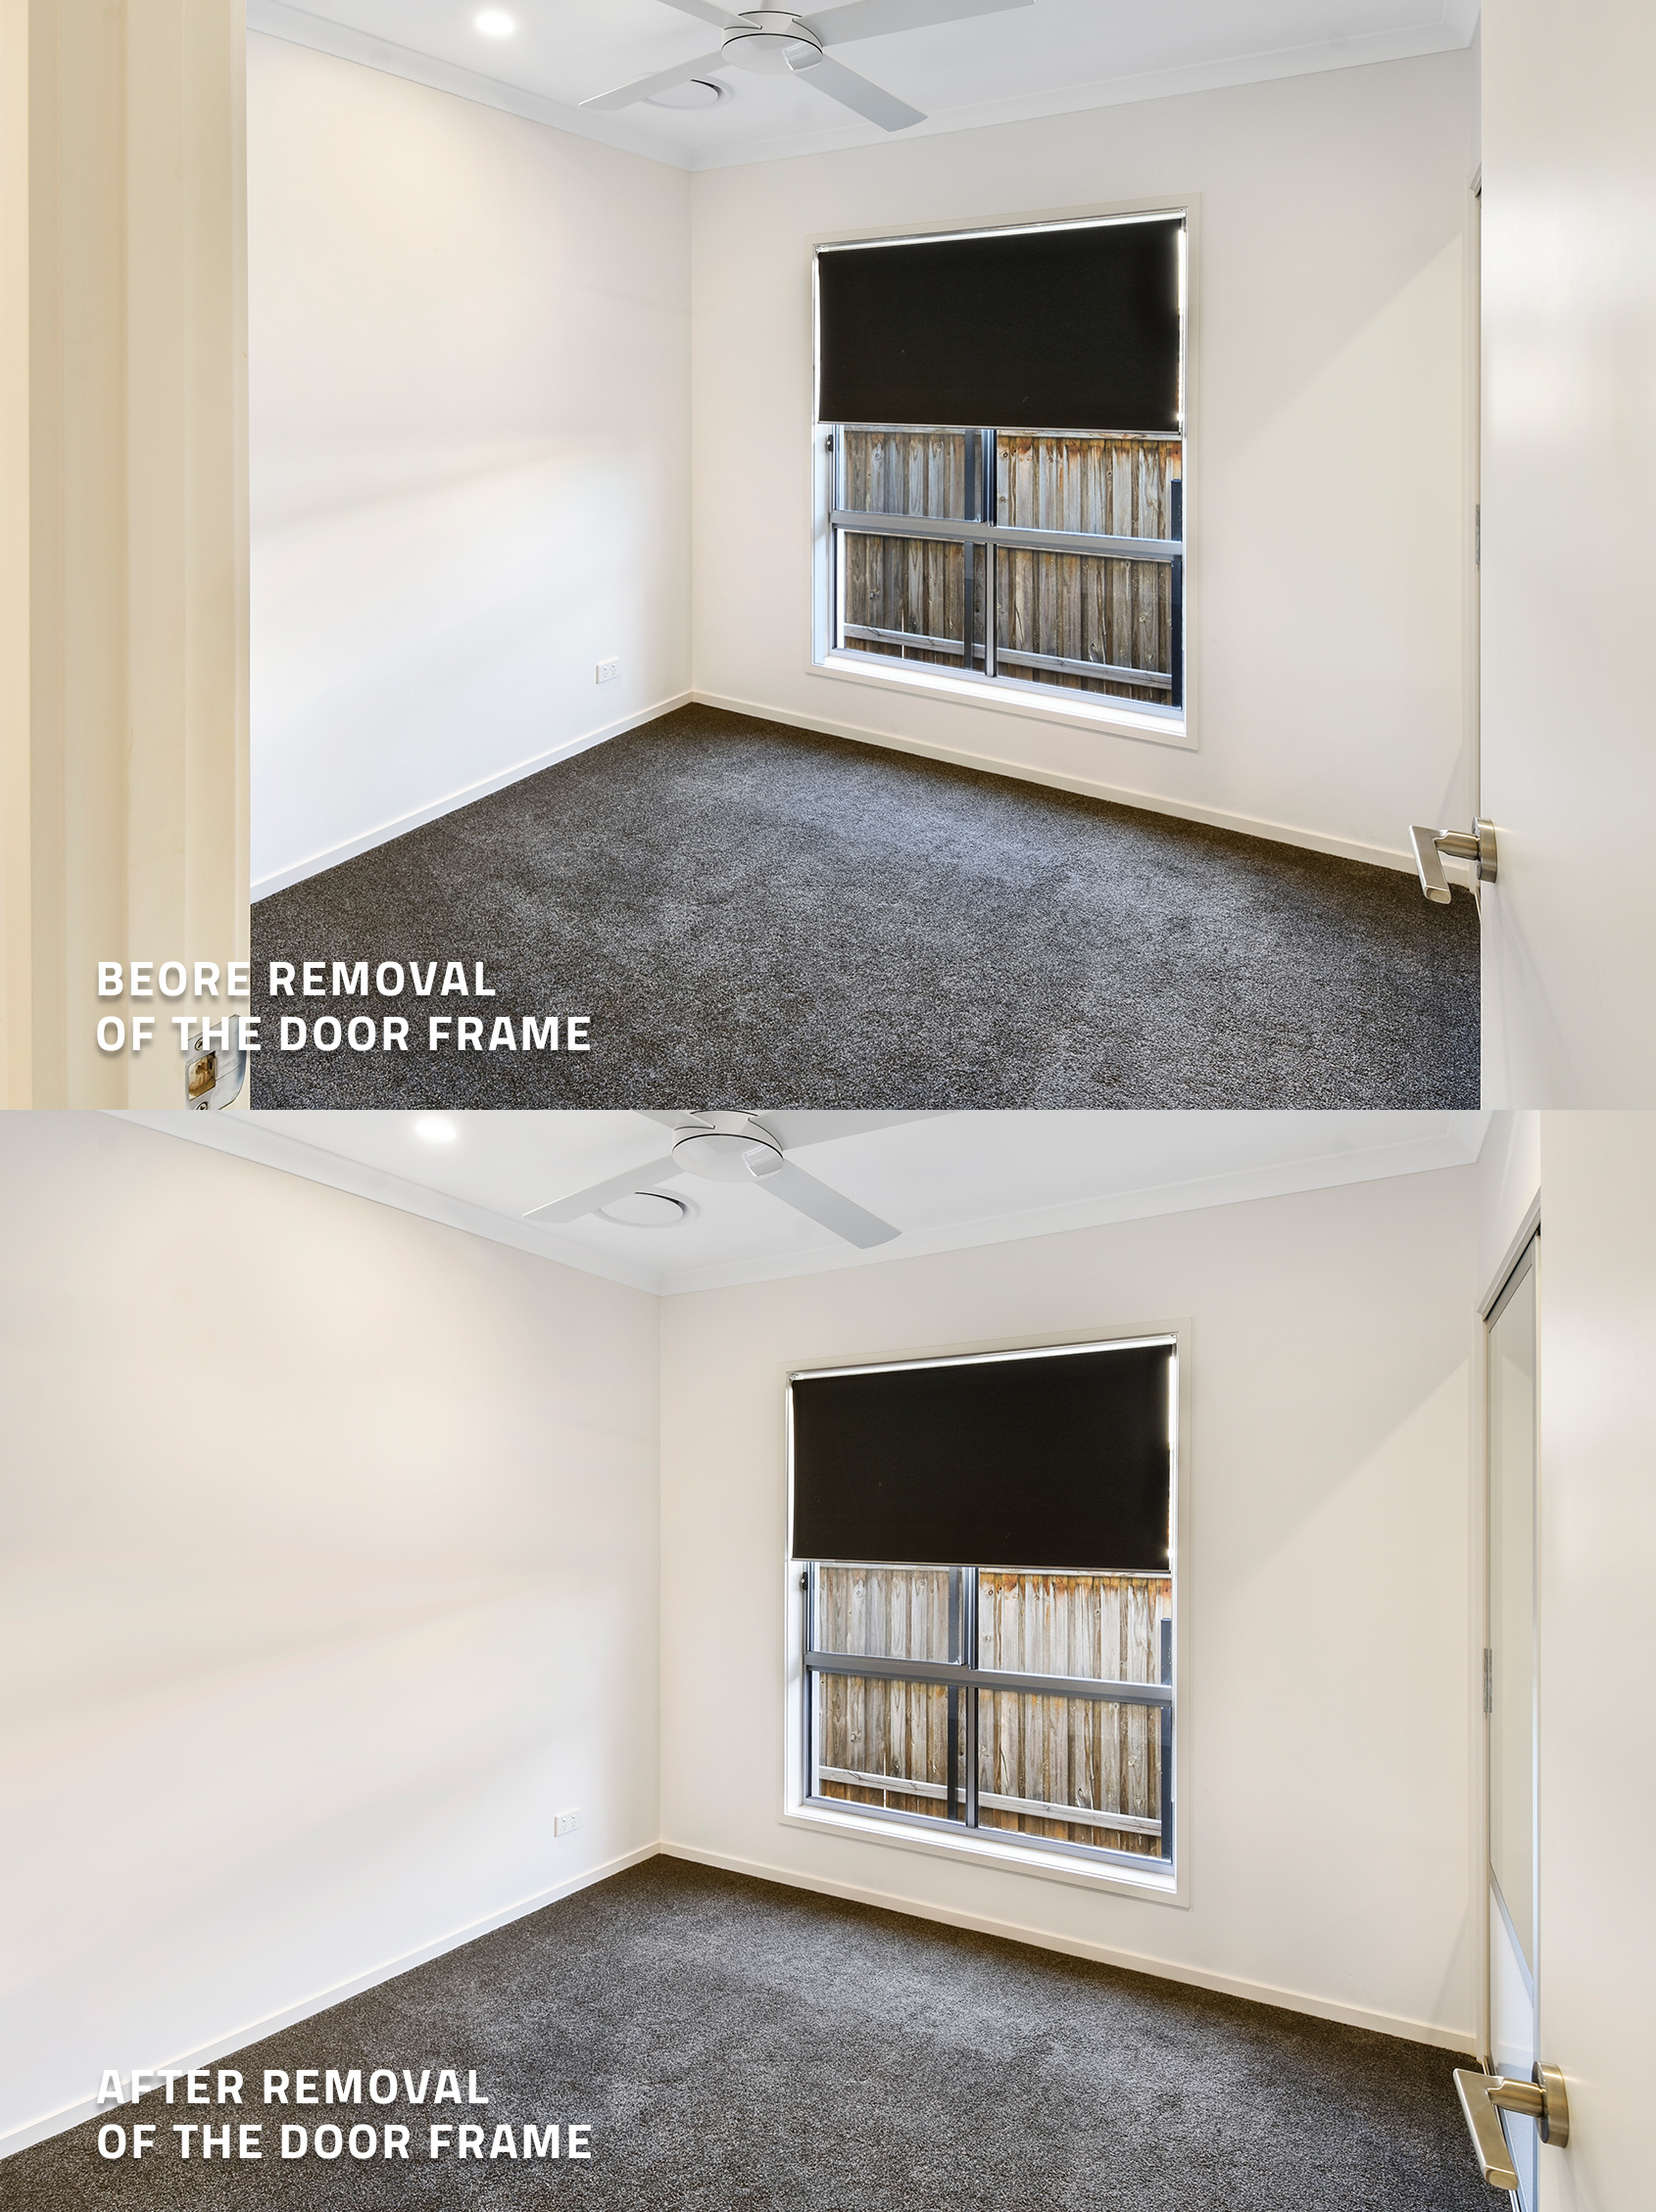
Include more of the door.
Again, this gives a true representation of the actual room size.

Remove or adjust distracting items.
The pot plant on the chest of drawers is quite distracting in the below image. Remove or rotate the pot plant.

The finished product.
Lastly, we want to show you the difference when shooting the bedroom from the right angle. When removing the door frame from your shoot, you can see it shows more of the room. The bedroom almost looks bigger once the frame has been removed.
Conclusion
With those key tips, you are well on your way to producing stunning images of bedrooms to help market your next listing.
RELATED ARTICLES

Patchy lawns can kill curb appeal — but digital edits come with rules. Learn how to enhance your listing ethically, stay MLS-compliant, and wow buyers without misleading them. Click to see our expert tips!
READ MORE
Lifestyle photos do more than show a property—they tell a story. Highlight interiors, amenities, and local surroundings to help buyers, renters, or guests envision living or staying there, boosting engagement and bookings.
READ MORE
Think phone photos can't compete? Think again. In this photo review, Brad breaks down real images taken by agents using only their phones — and shows how simple tweaks with SnapSnapSnap can turn average into amazing.
READ MORE
The list that keeps on giving. Our enormously popular Pre-Photography checklist is intended to be used with every new house a photographer must shoot. Here we’ll show you how it can save bundles of time and pave the way to much stronger marketing materials. Discover why the checklist has become our most downloaded document.
READ MORE
Smartphone cameras are getting really good these days… but can they take photos good enough for real estate photography? Well, what better way to put it to the test than by shooting a $4.2 million dollar commercial property with a smartphone!
READ MORE
It’s a 360° camera shoot-out! Read to find out how three 360° cameras rank when it comes to shooting panoramic property images and decide which one is the best for your real estate photography needs.
READ MORE