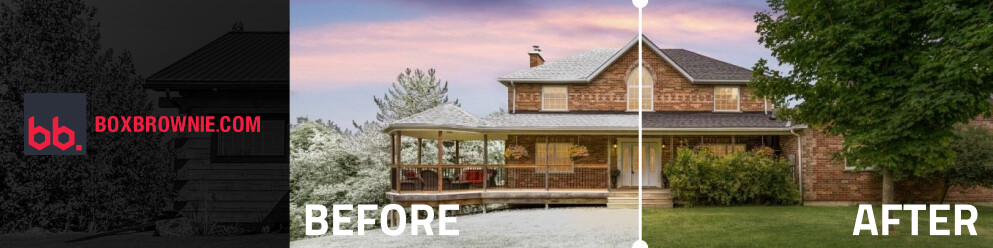
REAL ESTATE PHOTOGRAPHY TIPS
Introduction
Want to learn how to take amazing real estate photos that attract more buyers? Well you’ve come to the right place! In this article, world class real estate photographer Brad Filliponi shares some of his tips and tricks on how to make your property images stand out.
Setting Up The House
Preparation is essential before shooting a property. In fact, preparation is equally as important as the shooting itself! Make sure that:
1. Kitchen stools and dining chairs are pushed in neatly.
2. Leave in items like fruit bowls as they can add an extra pop of color to your image.
3. Open up doors to outside areas to create space.
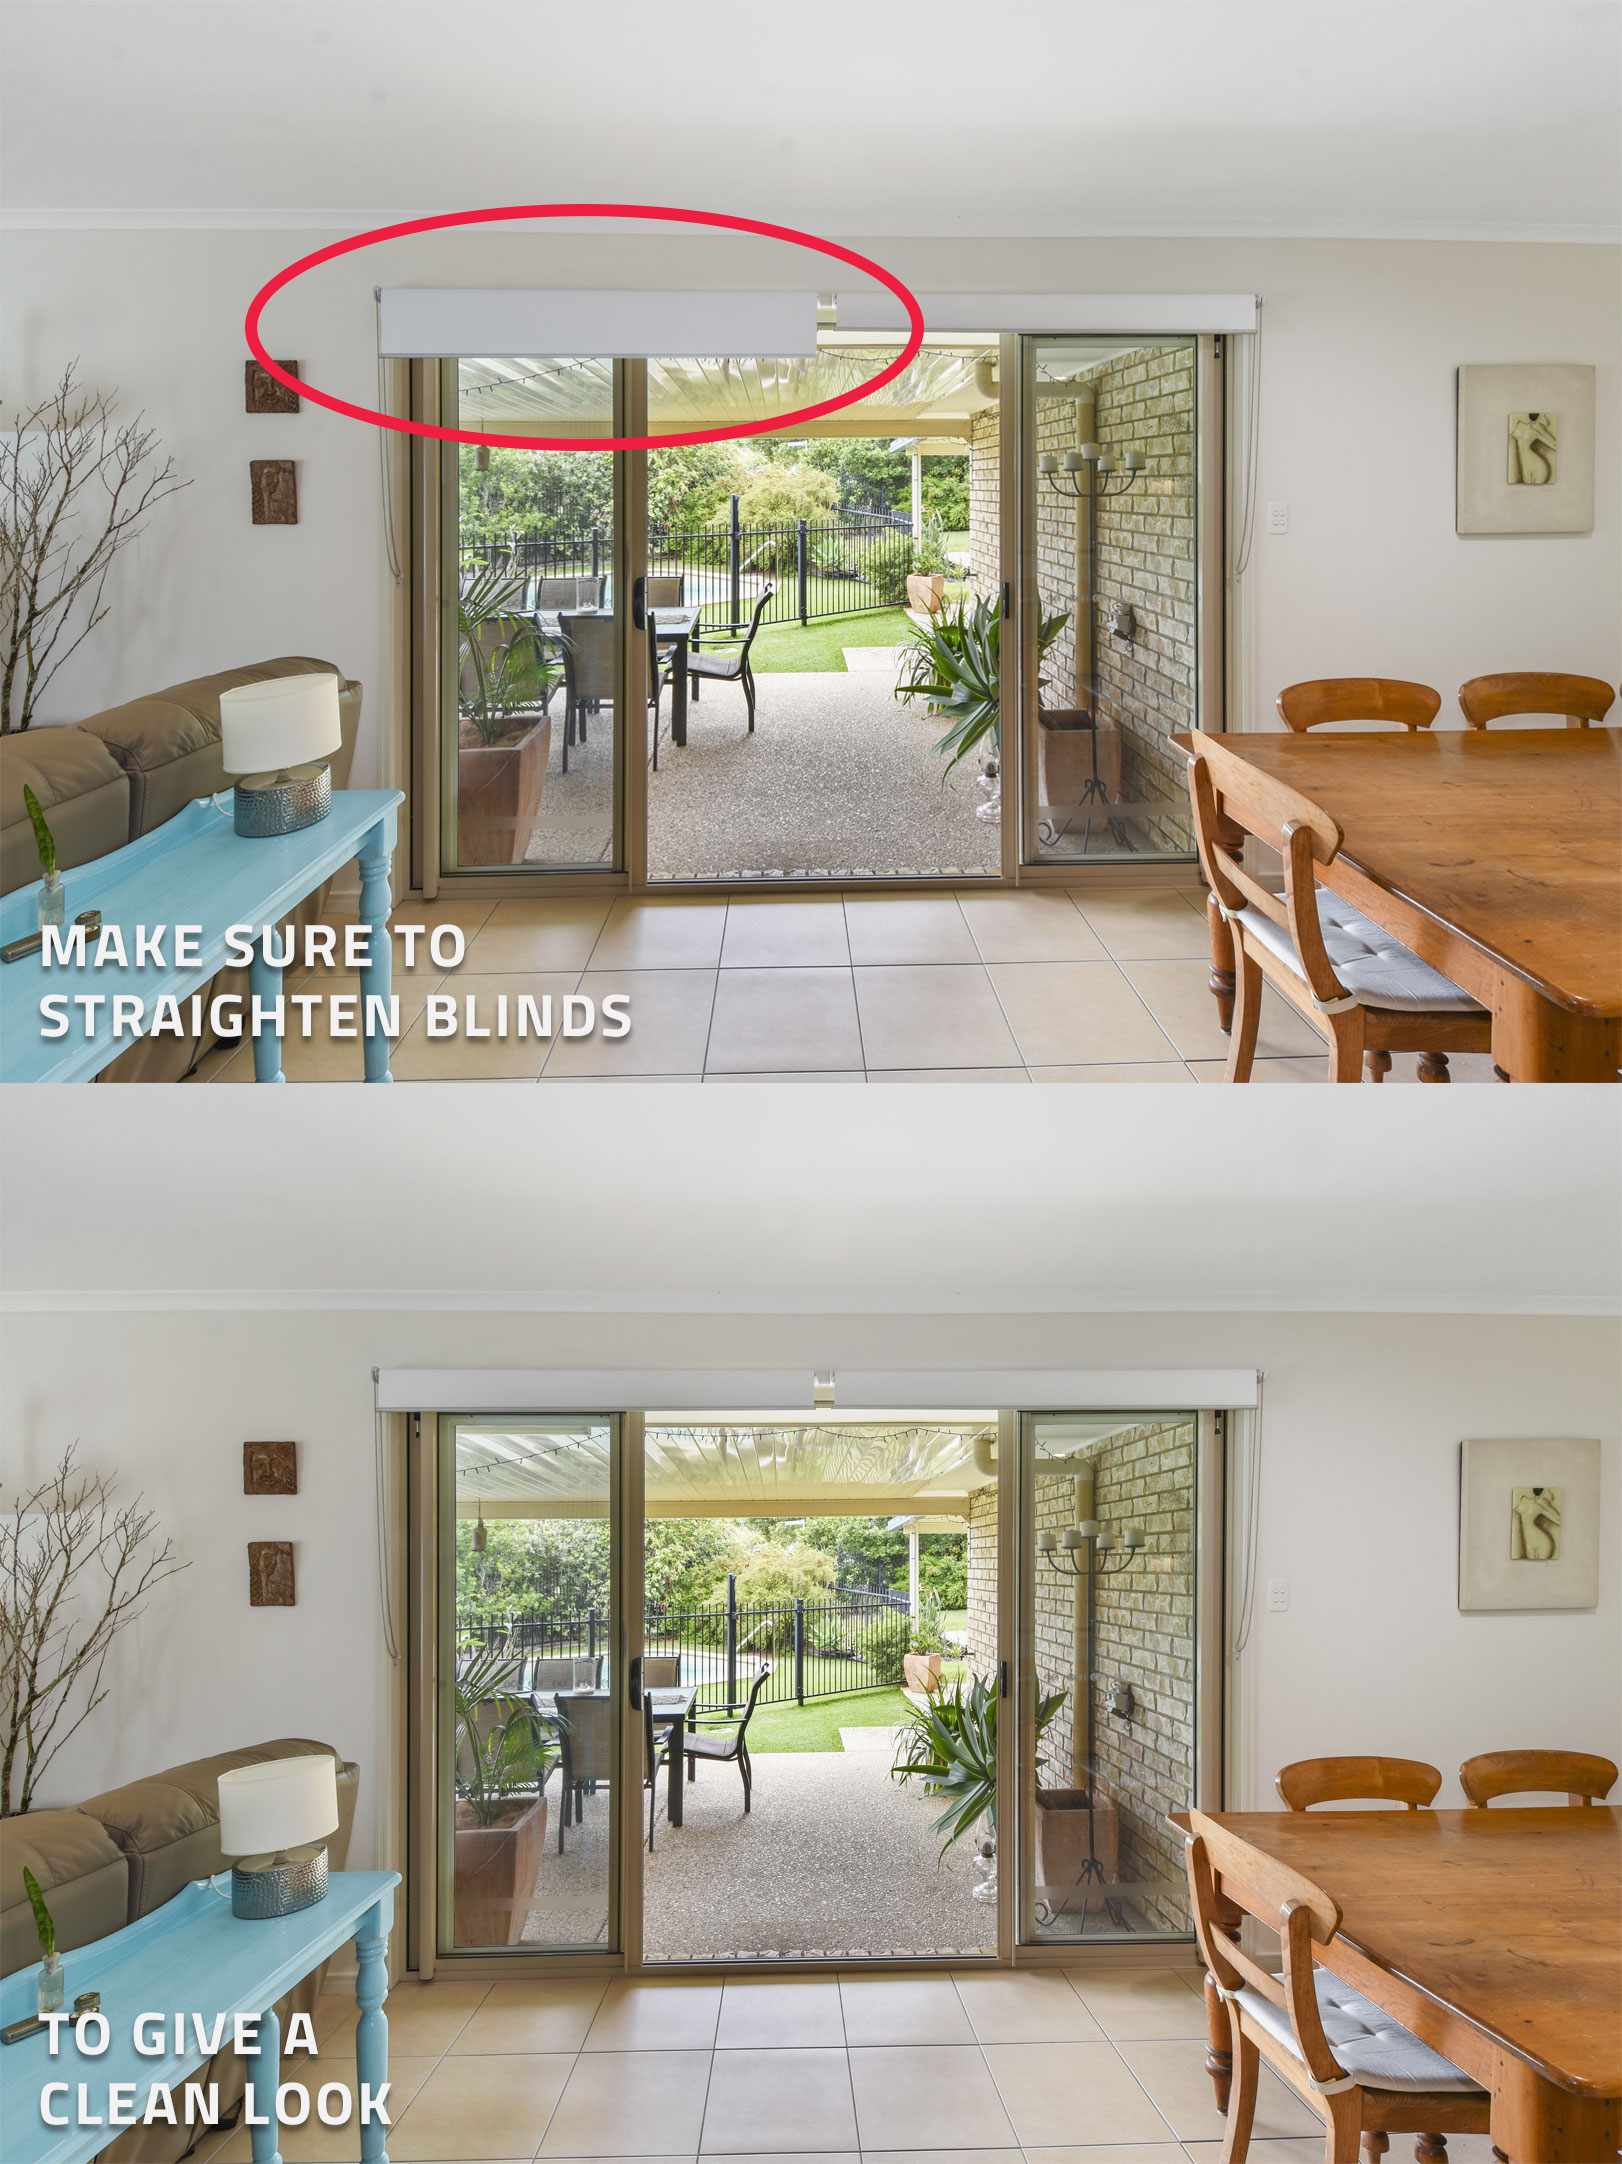
4. Straighten blinds evenly to give a clean look.
5. Remove pet related items including eating bowls and toys. Hallways are a great place to temporarily place unnecessary items as you generally don’t shoot them.
6. Straighten kettles and coffee machines.
7. Switch on all lights. It’s simple to do and makes a big difference.
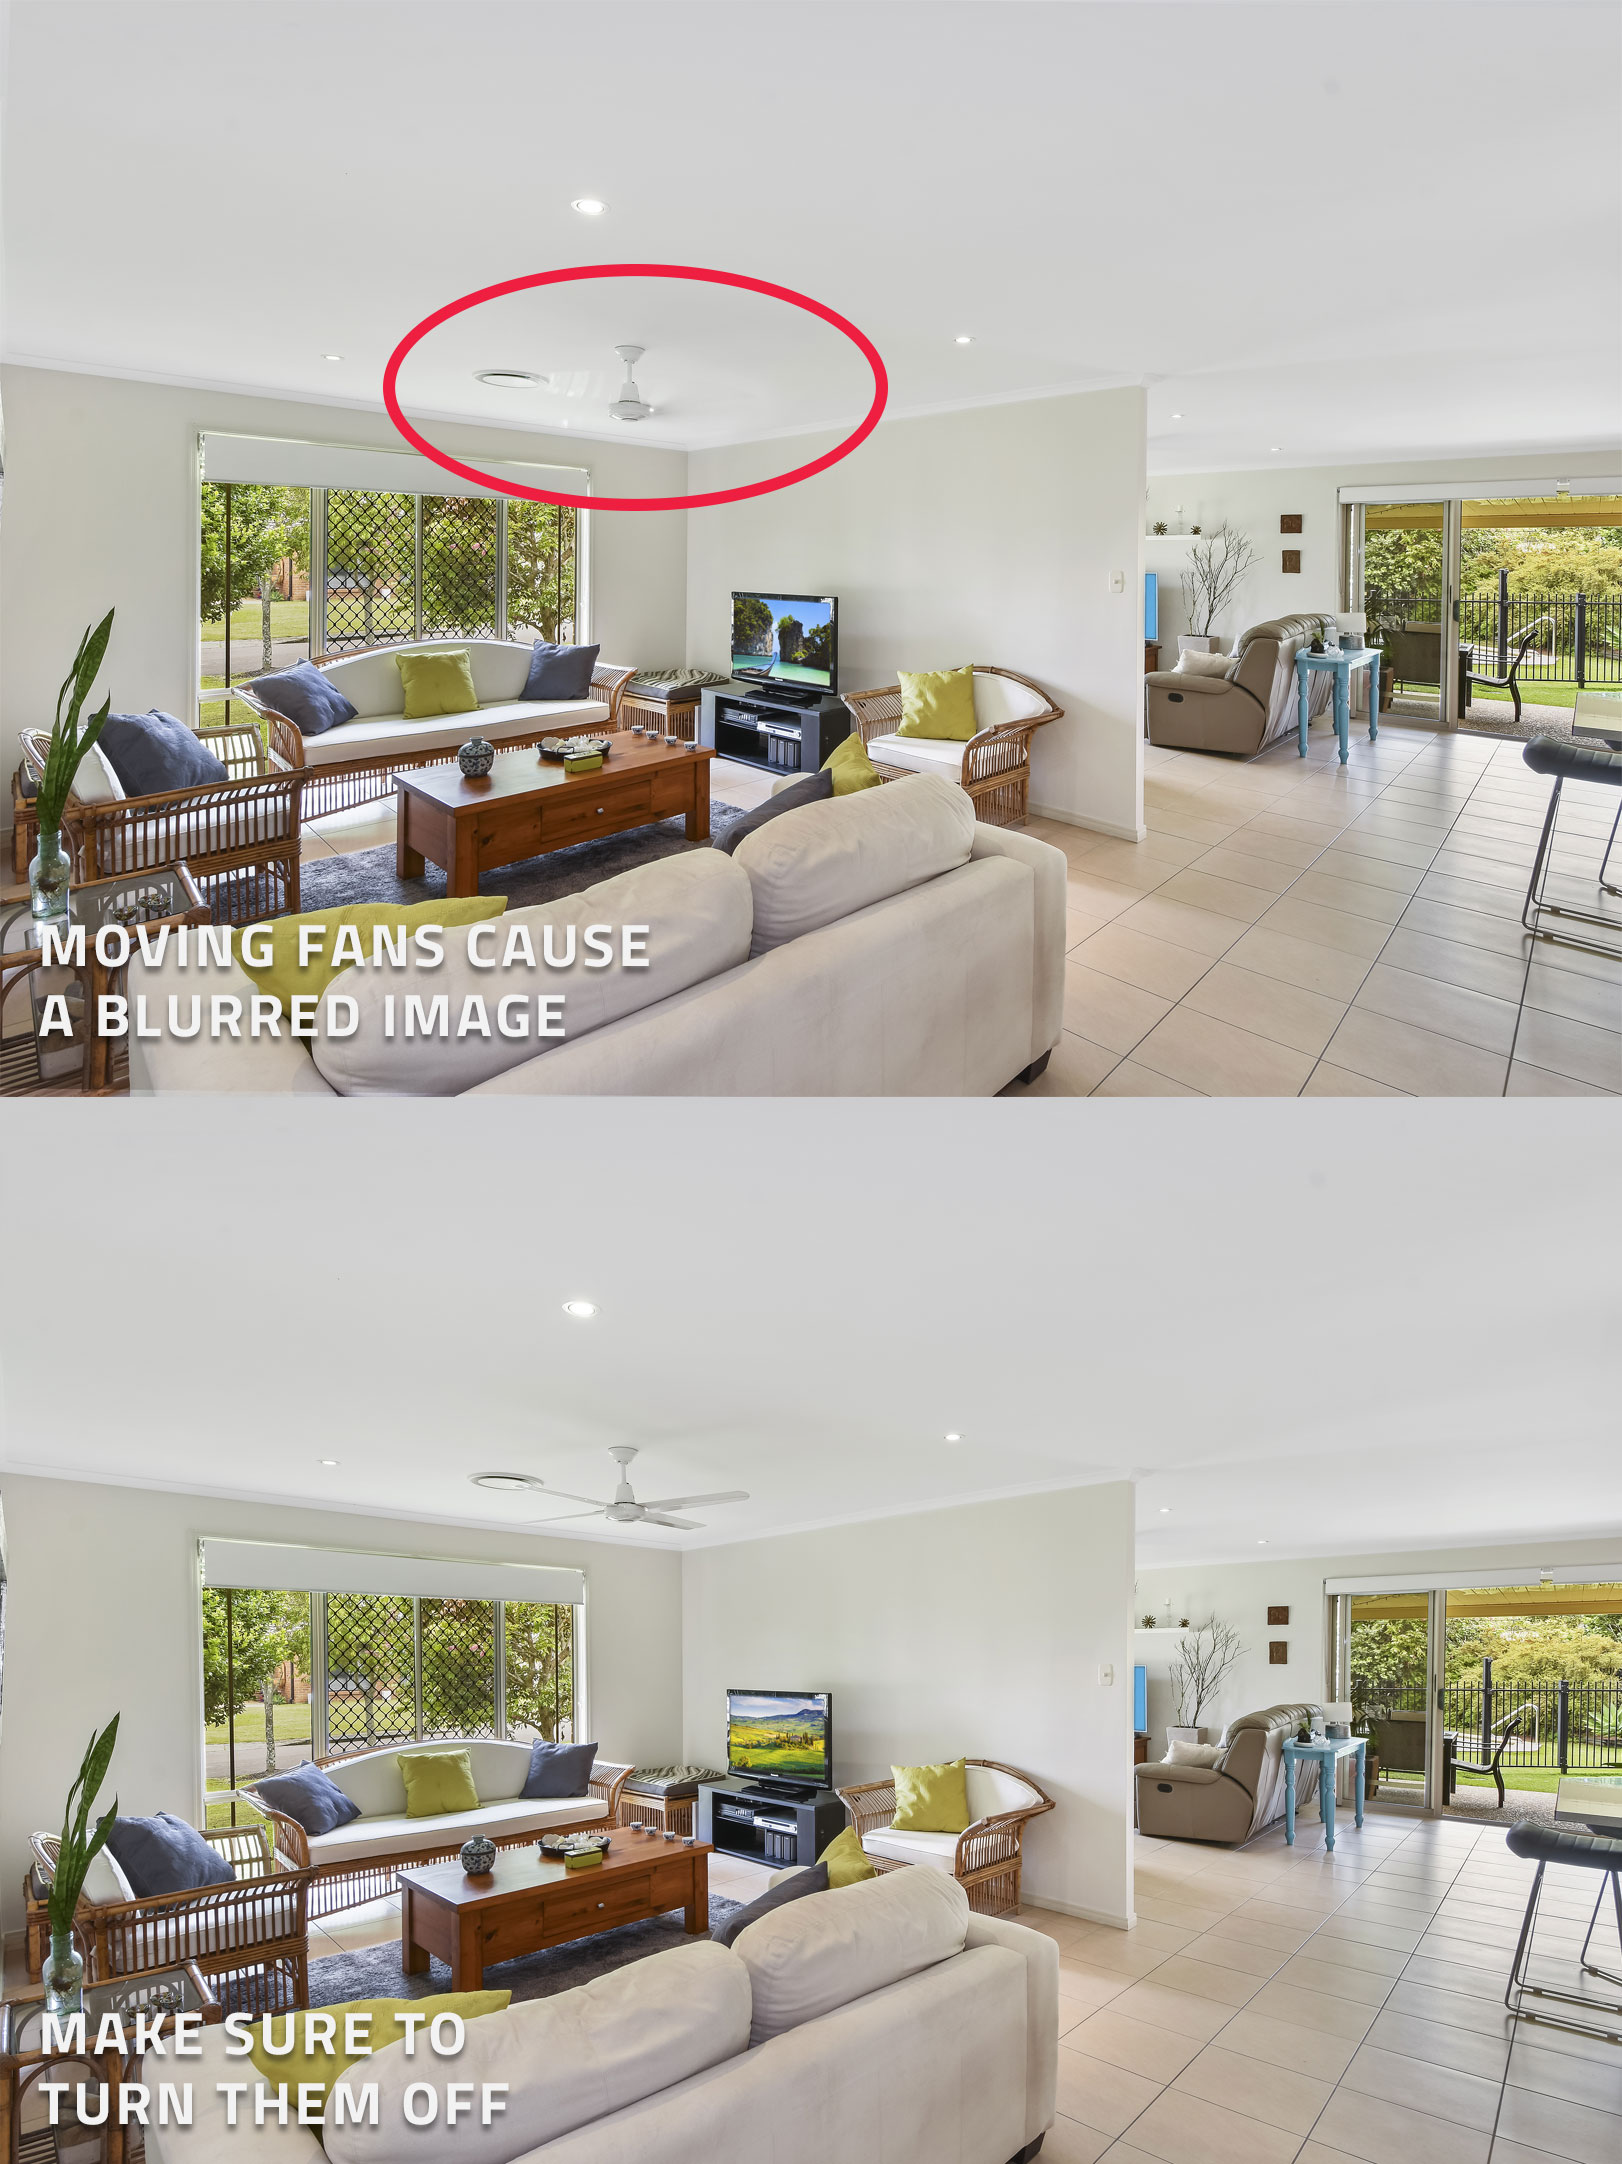
8. Make sure to turn off fans as moving subjects in photos don’t look good.
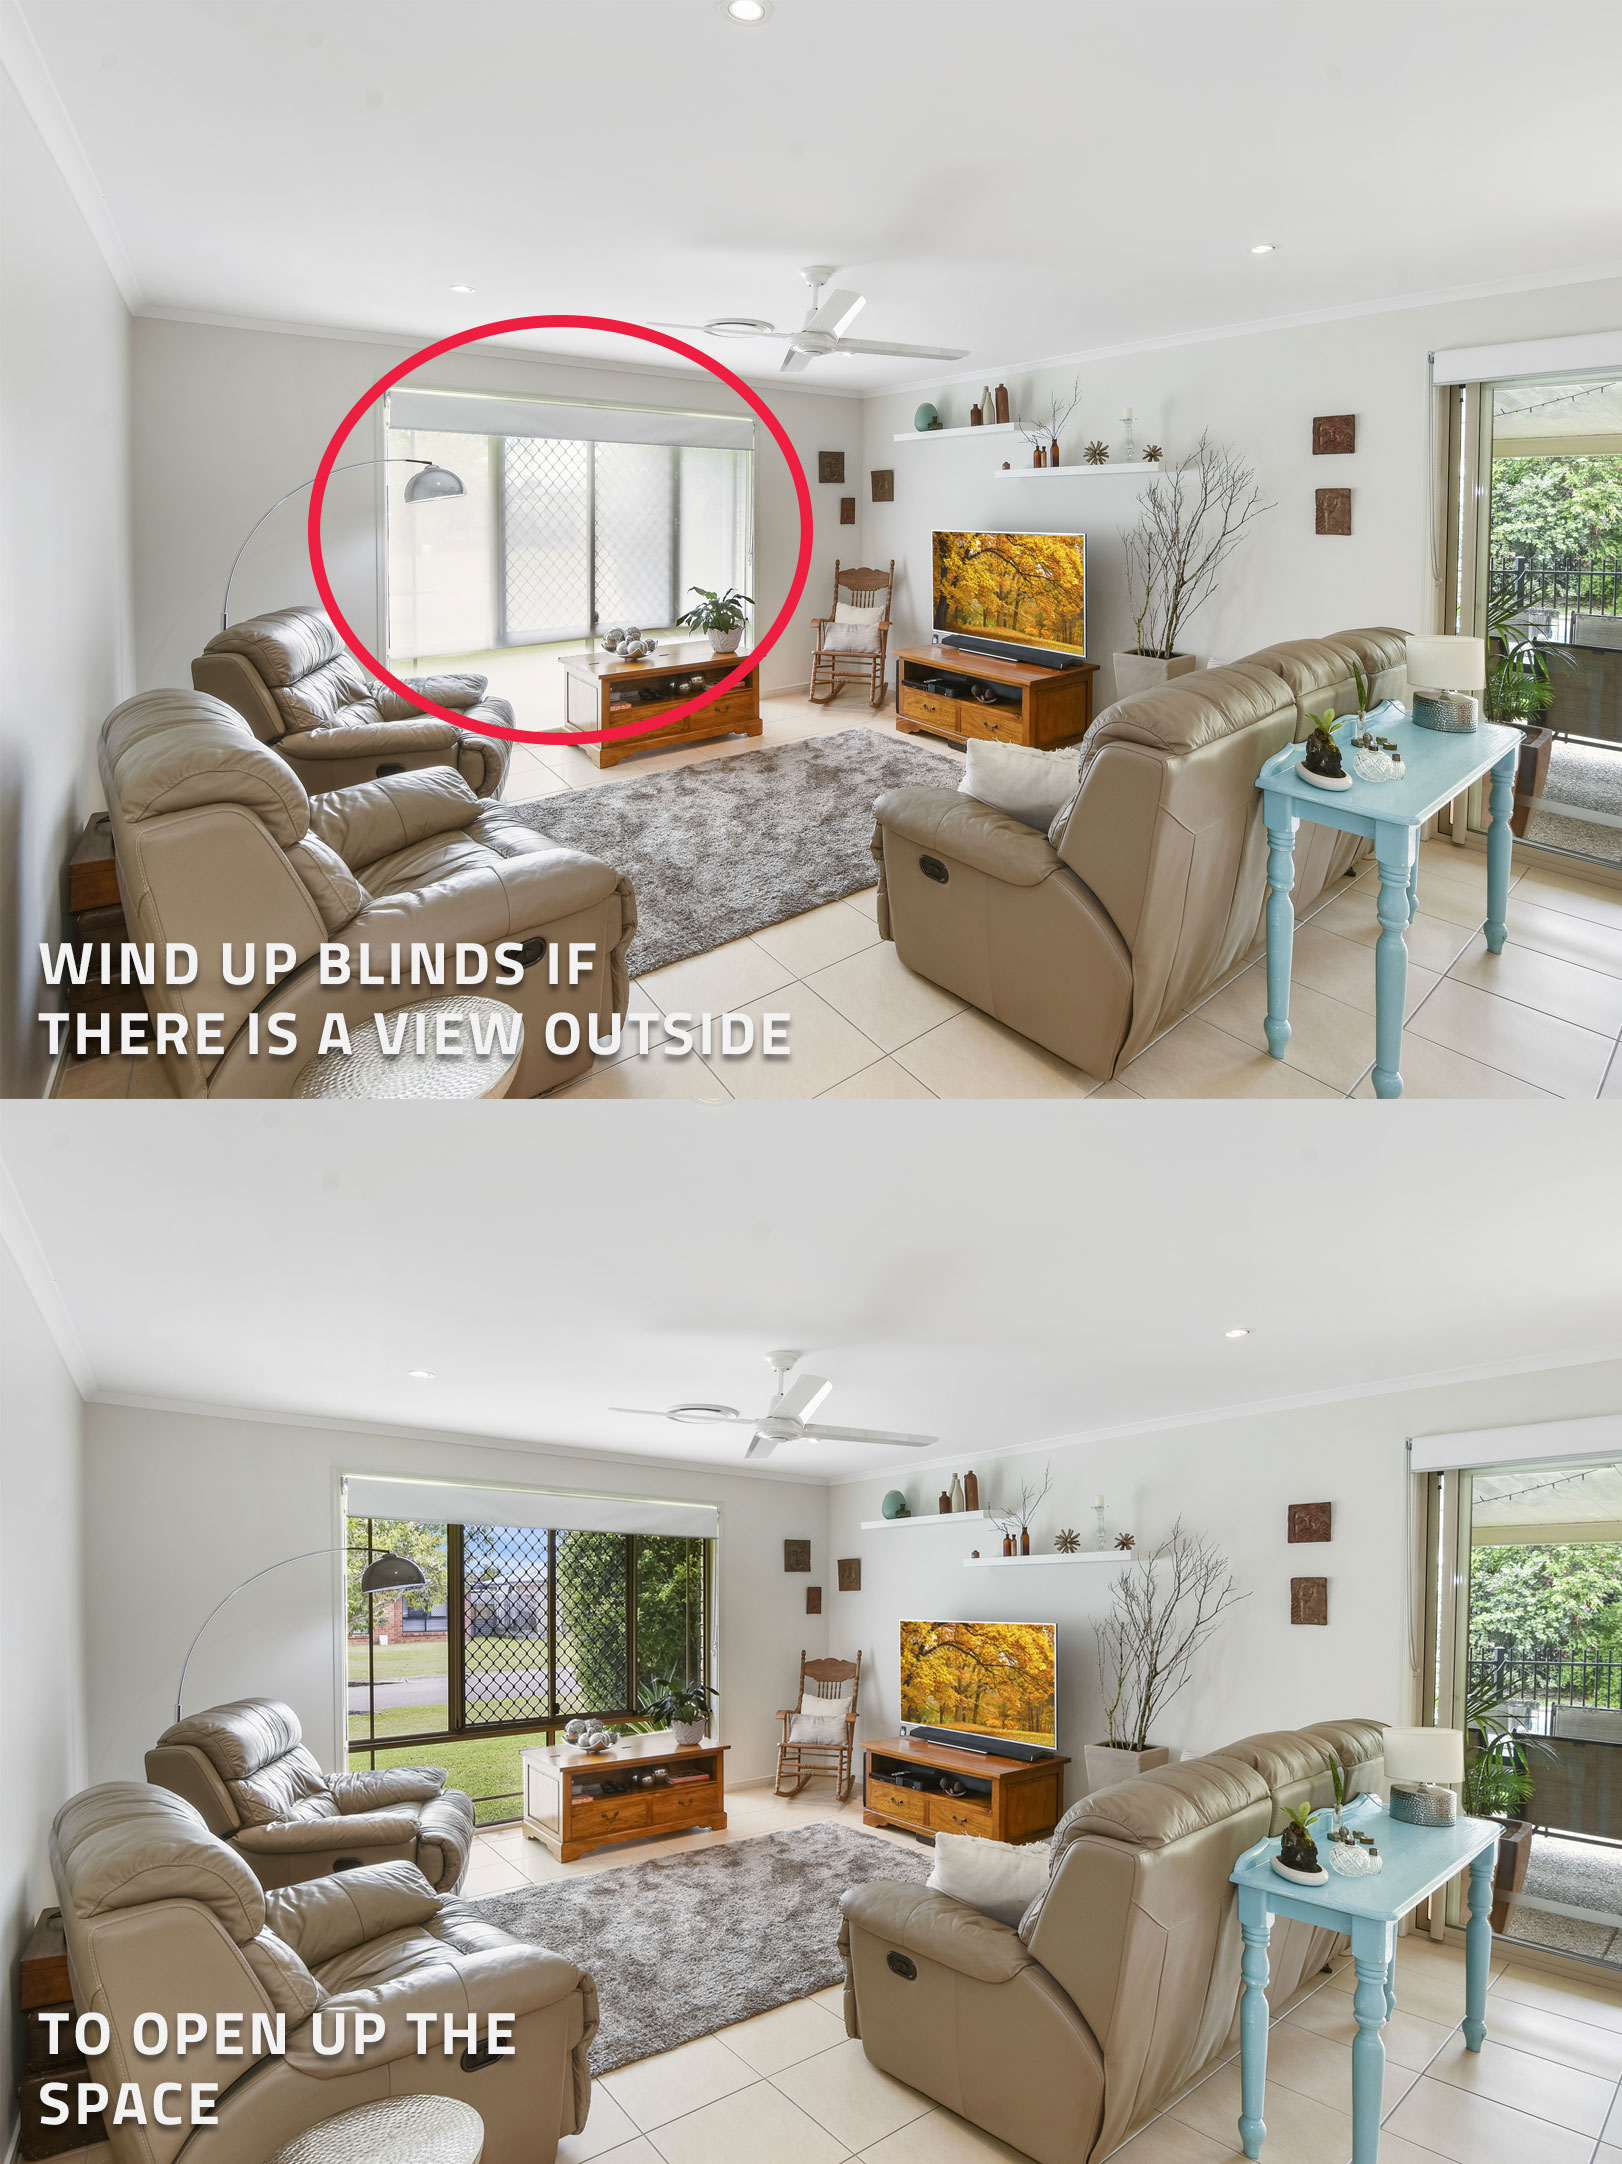
9. If there is a view outside, make sure to pull the blinds up and show it! This will open up the whole room and will make the shot look a lot more spacious.
HDR Photography
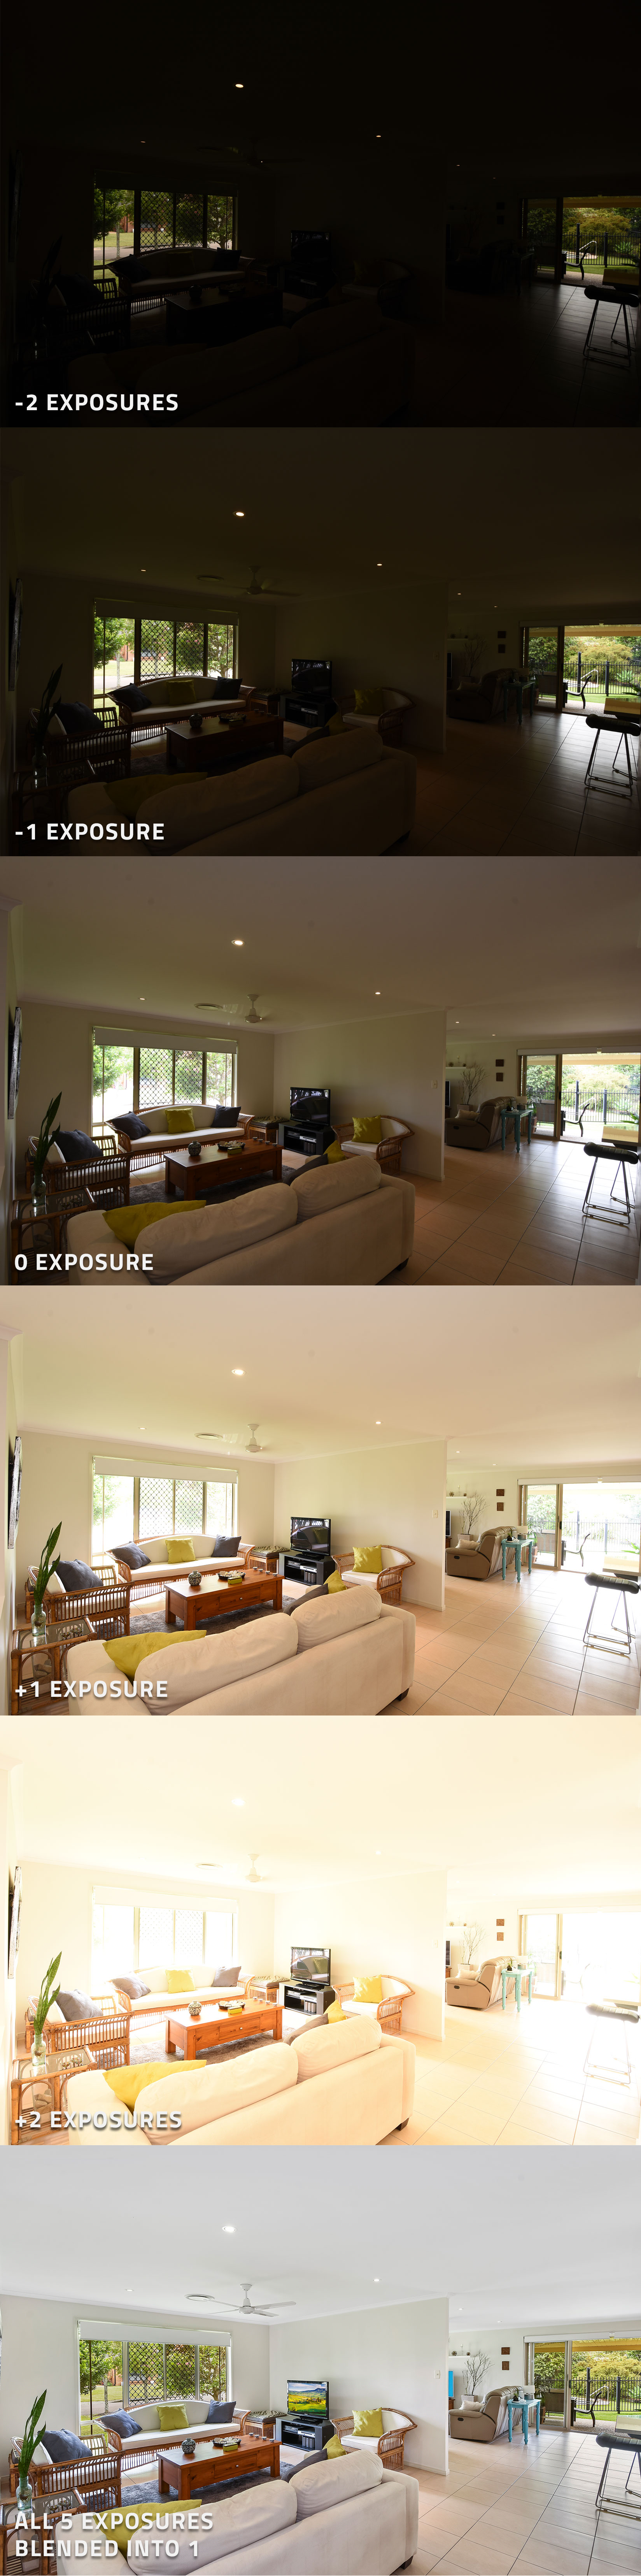
HDR photography is where multiple exposures of the same shot are taken. Detail from each exposure can then be blended together seamlessly to create a professional final image.
Blending brackets together is time consuming which is why we offer this service under Image Enhancement edit.
Brad shoots with the D7200 which is ideal for real estate photography. The D7200 automatically brackets and takes 5 sequence shots at 5 different exposures. Brad personally shoots using 5 brackets (rather then 7 or 9).
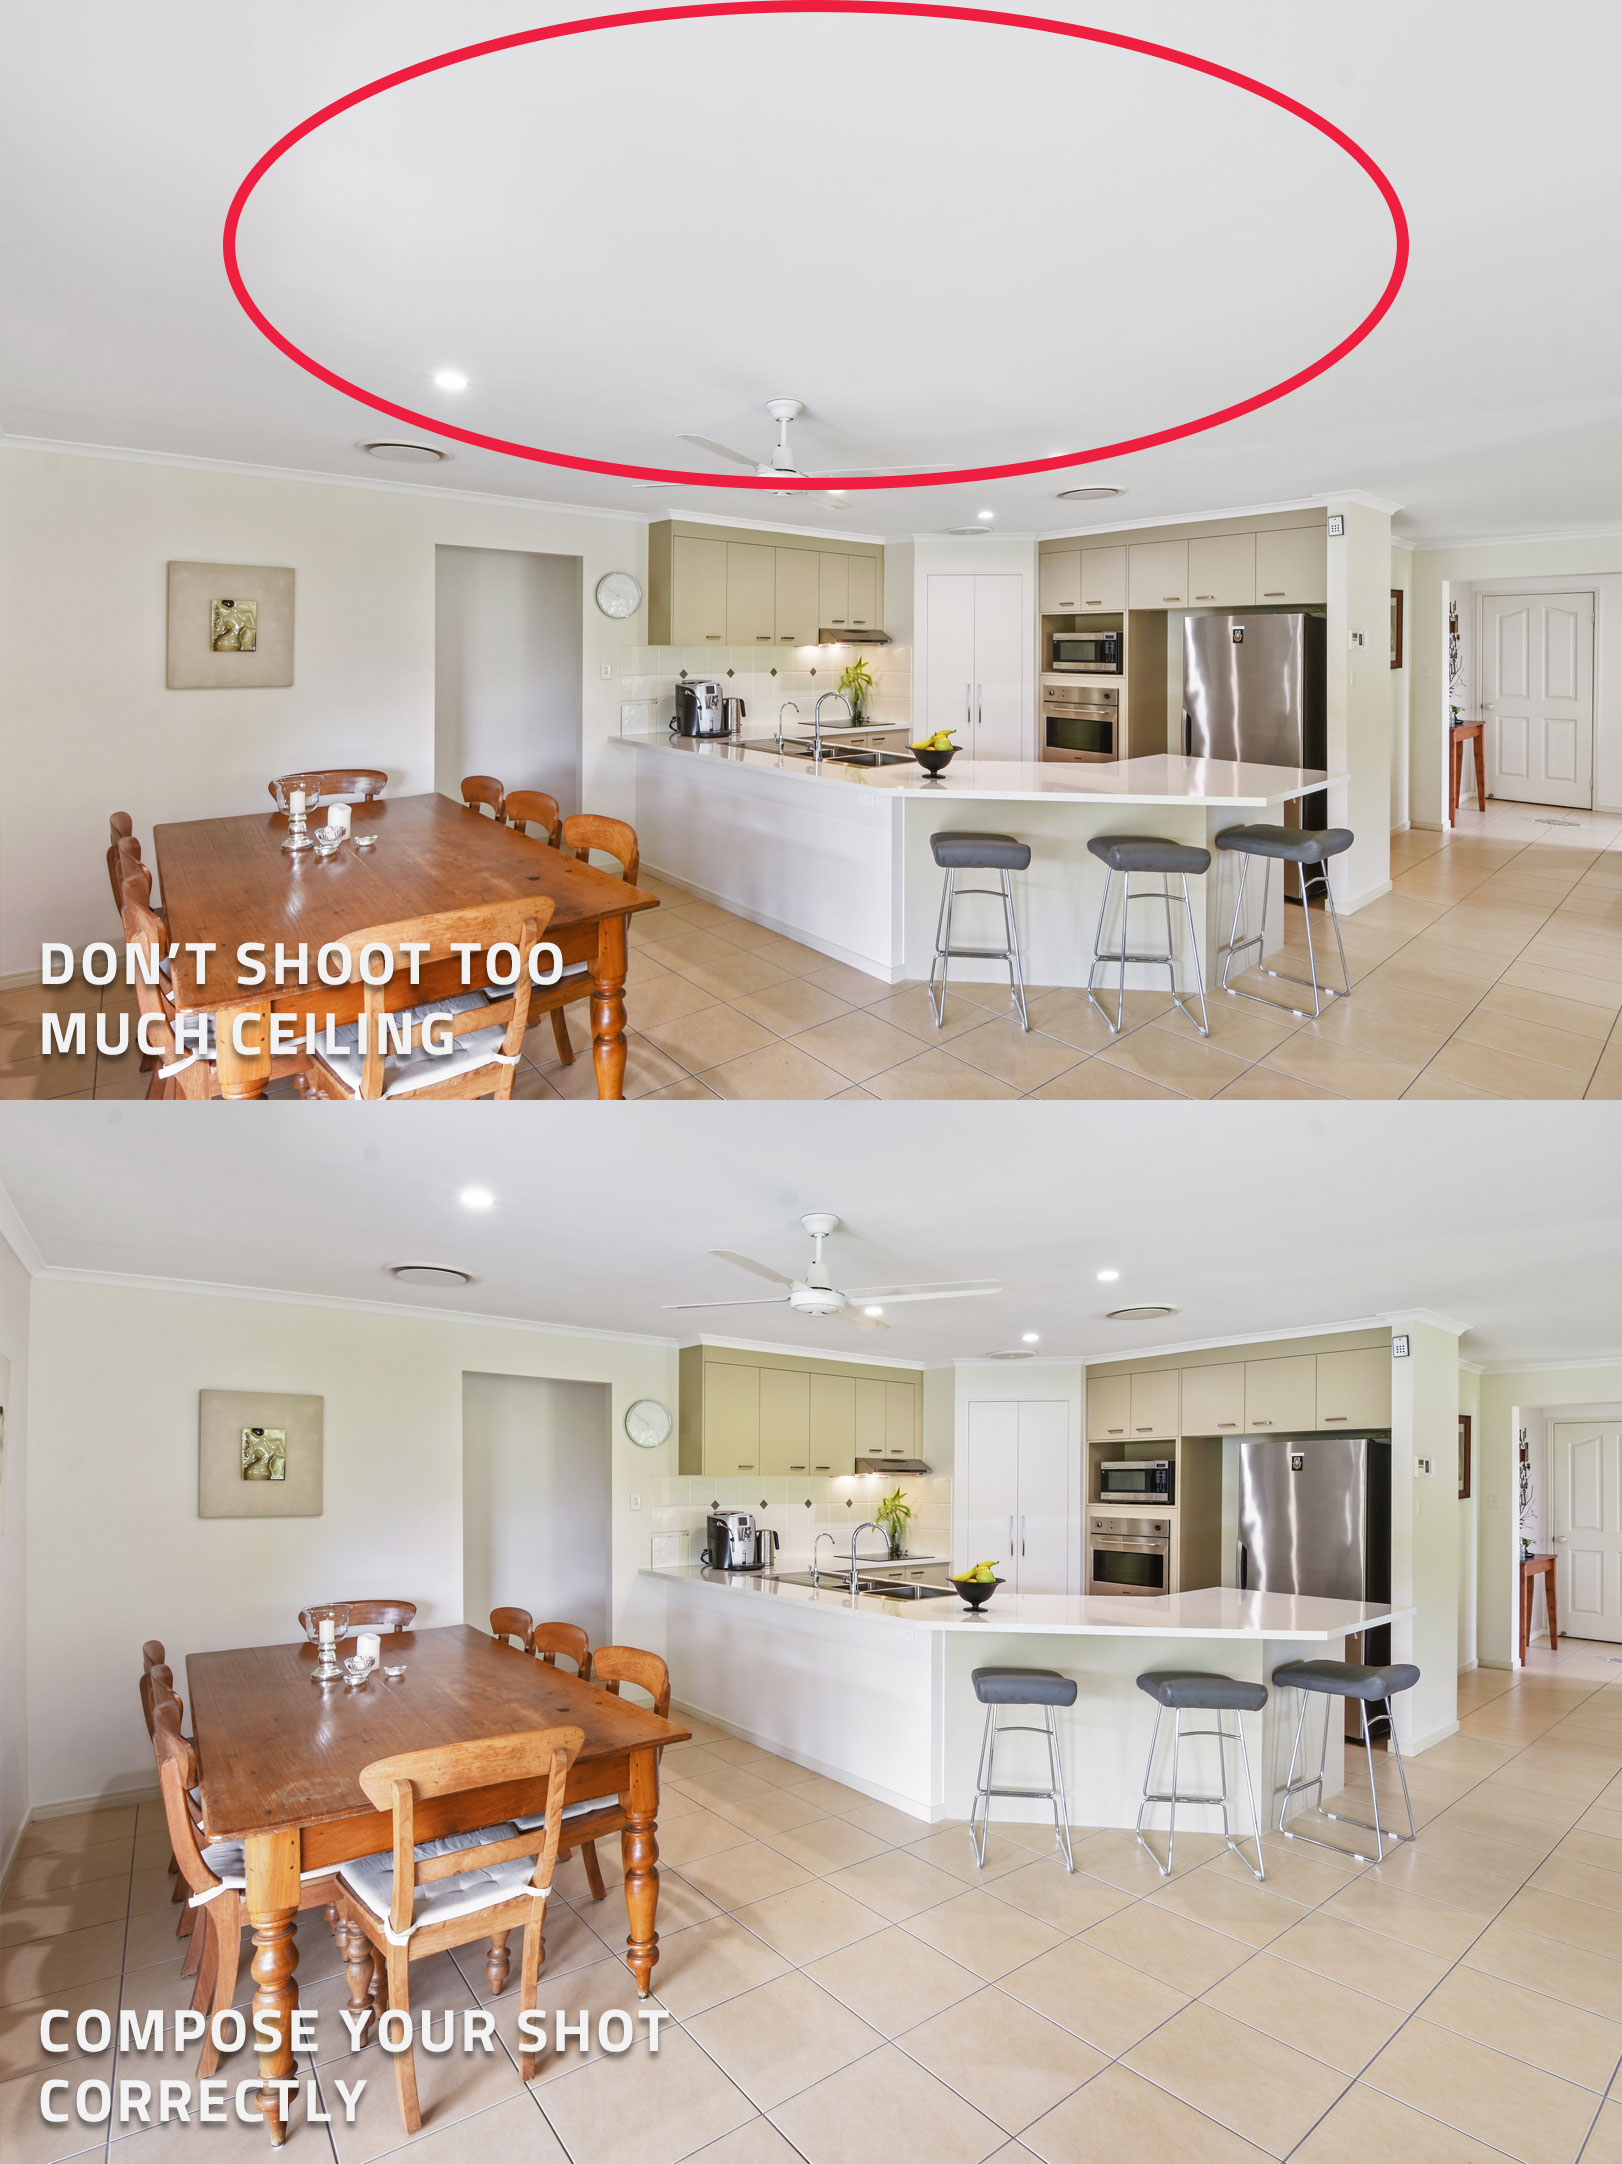
Composing Your Shot
Try and find the happy medium when composing your shot. Avoid aiming too high and shooting too much ceiling or sky and avoid shooting too low and shooting to much ground. Pin point the shot evenly in the middle and you’ll always get the best shot.
What Not To Shoot
There are a few areas that are generally best to leave out when it comes to real estate photography (as they simply don't sell well!). These areas include:
1. Laundries
2. Separate toilets
3. Pantries
4. Garage interiors
Only shoot these areas if the seller specifically requests for these rooms to be shot.
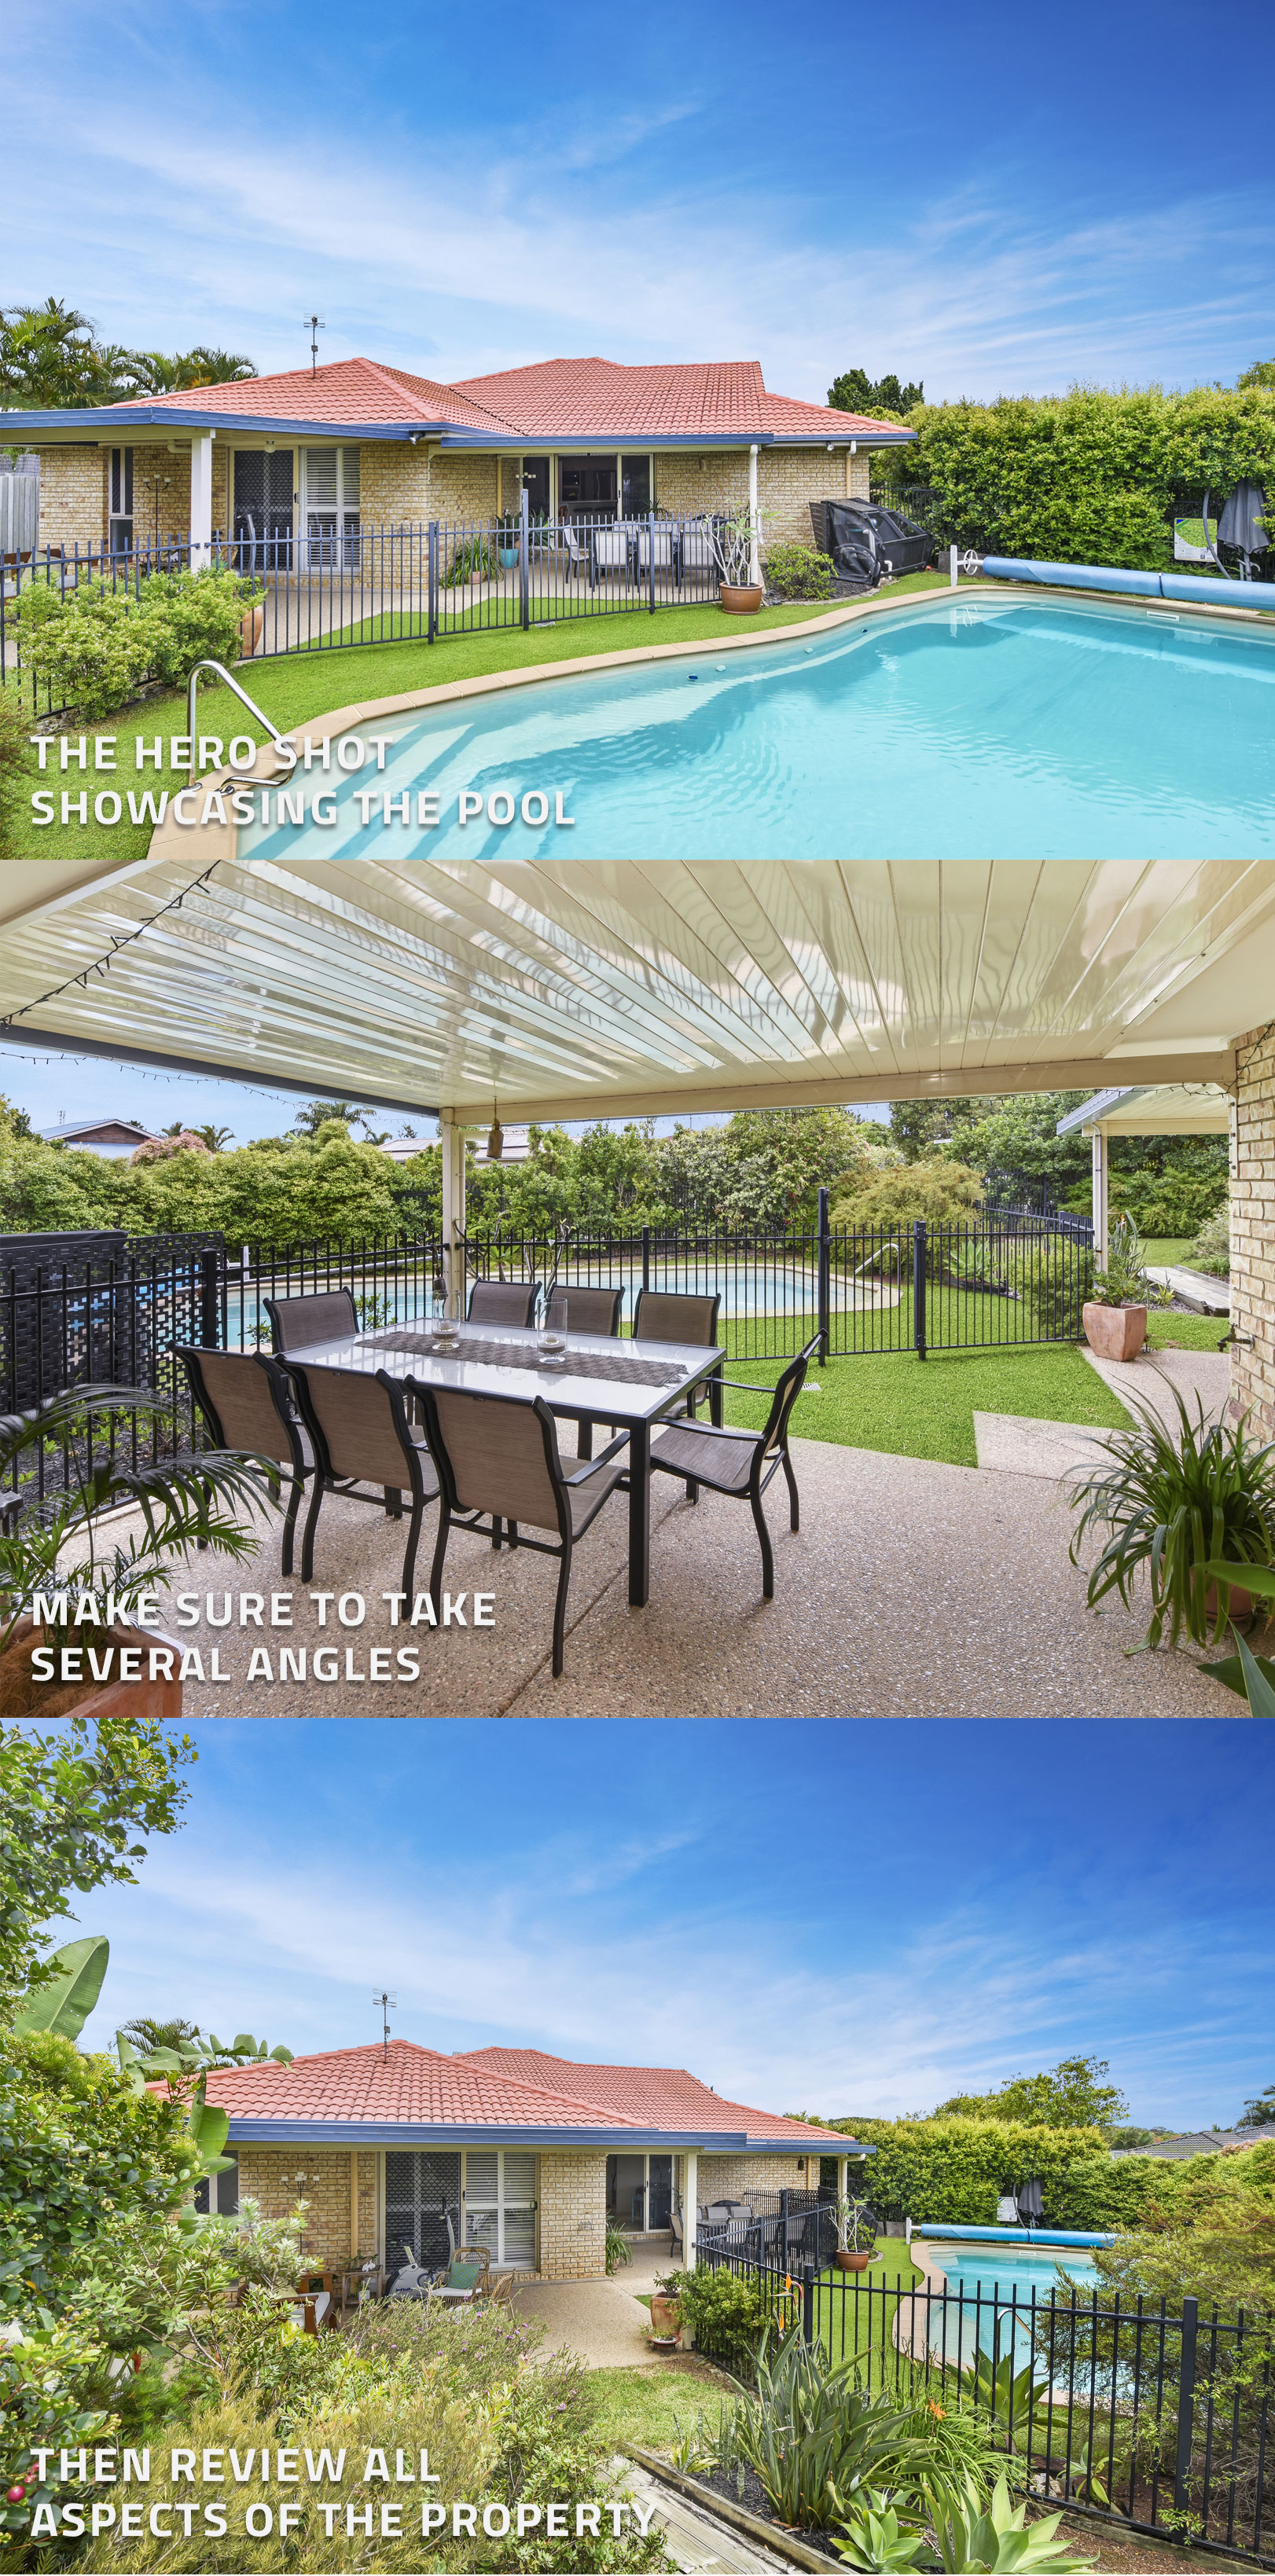
How To Find The Hero Shot
The hero shot is the best shot of your property (to showcase your listing). If the property has a pool, 9 times out of 10 the hero shot is going to be by the pool area shooting back towards the house. It is always best to shoot multiple angles to find the best aspect of the property.
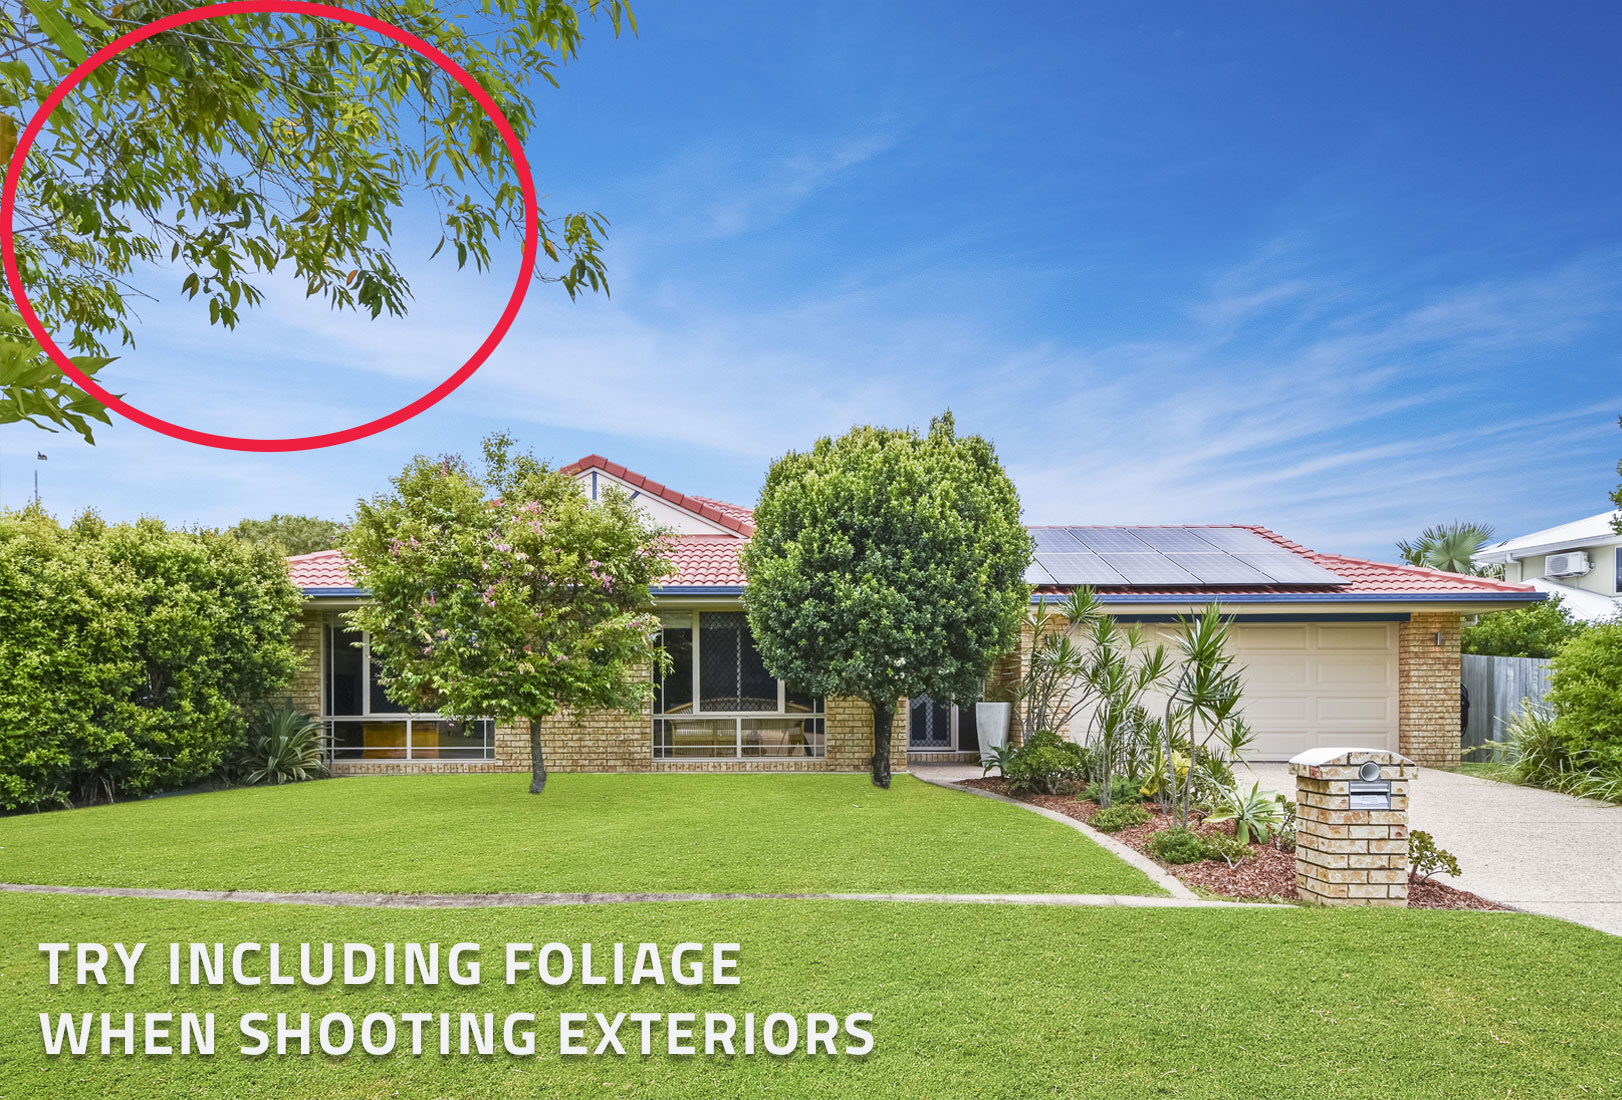
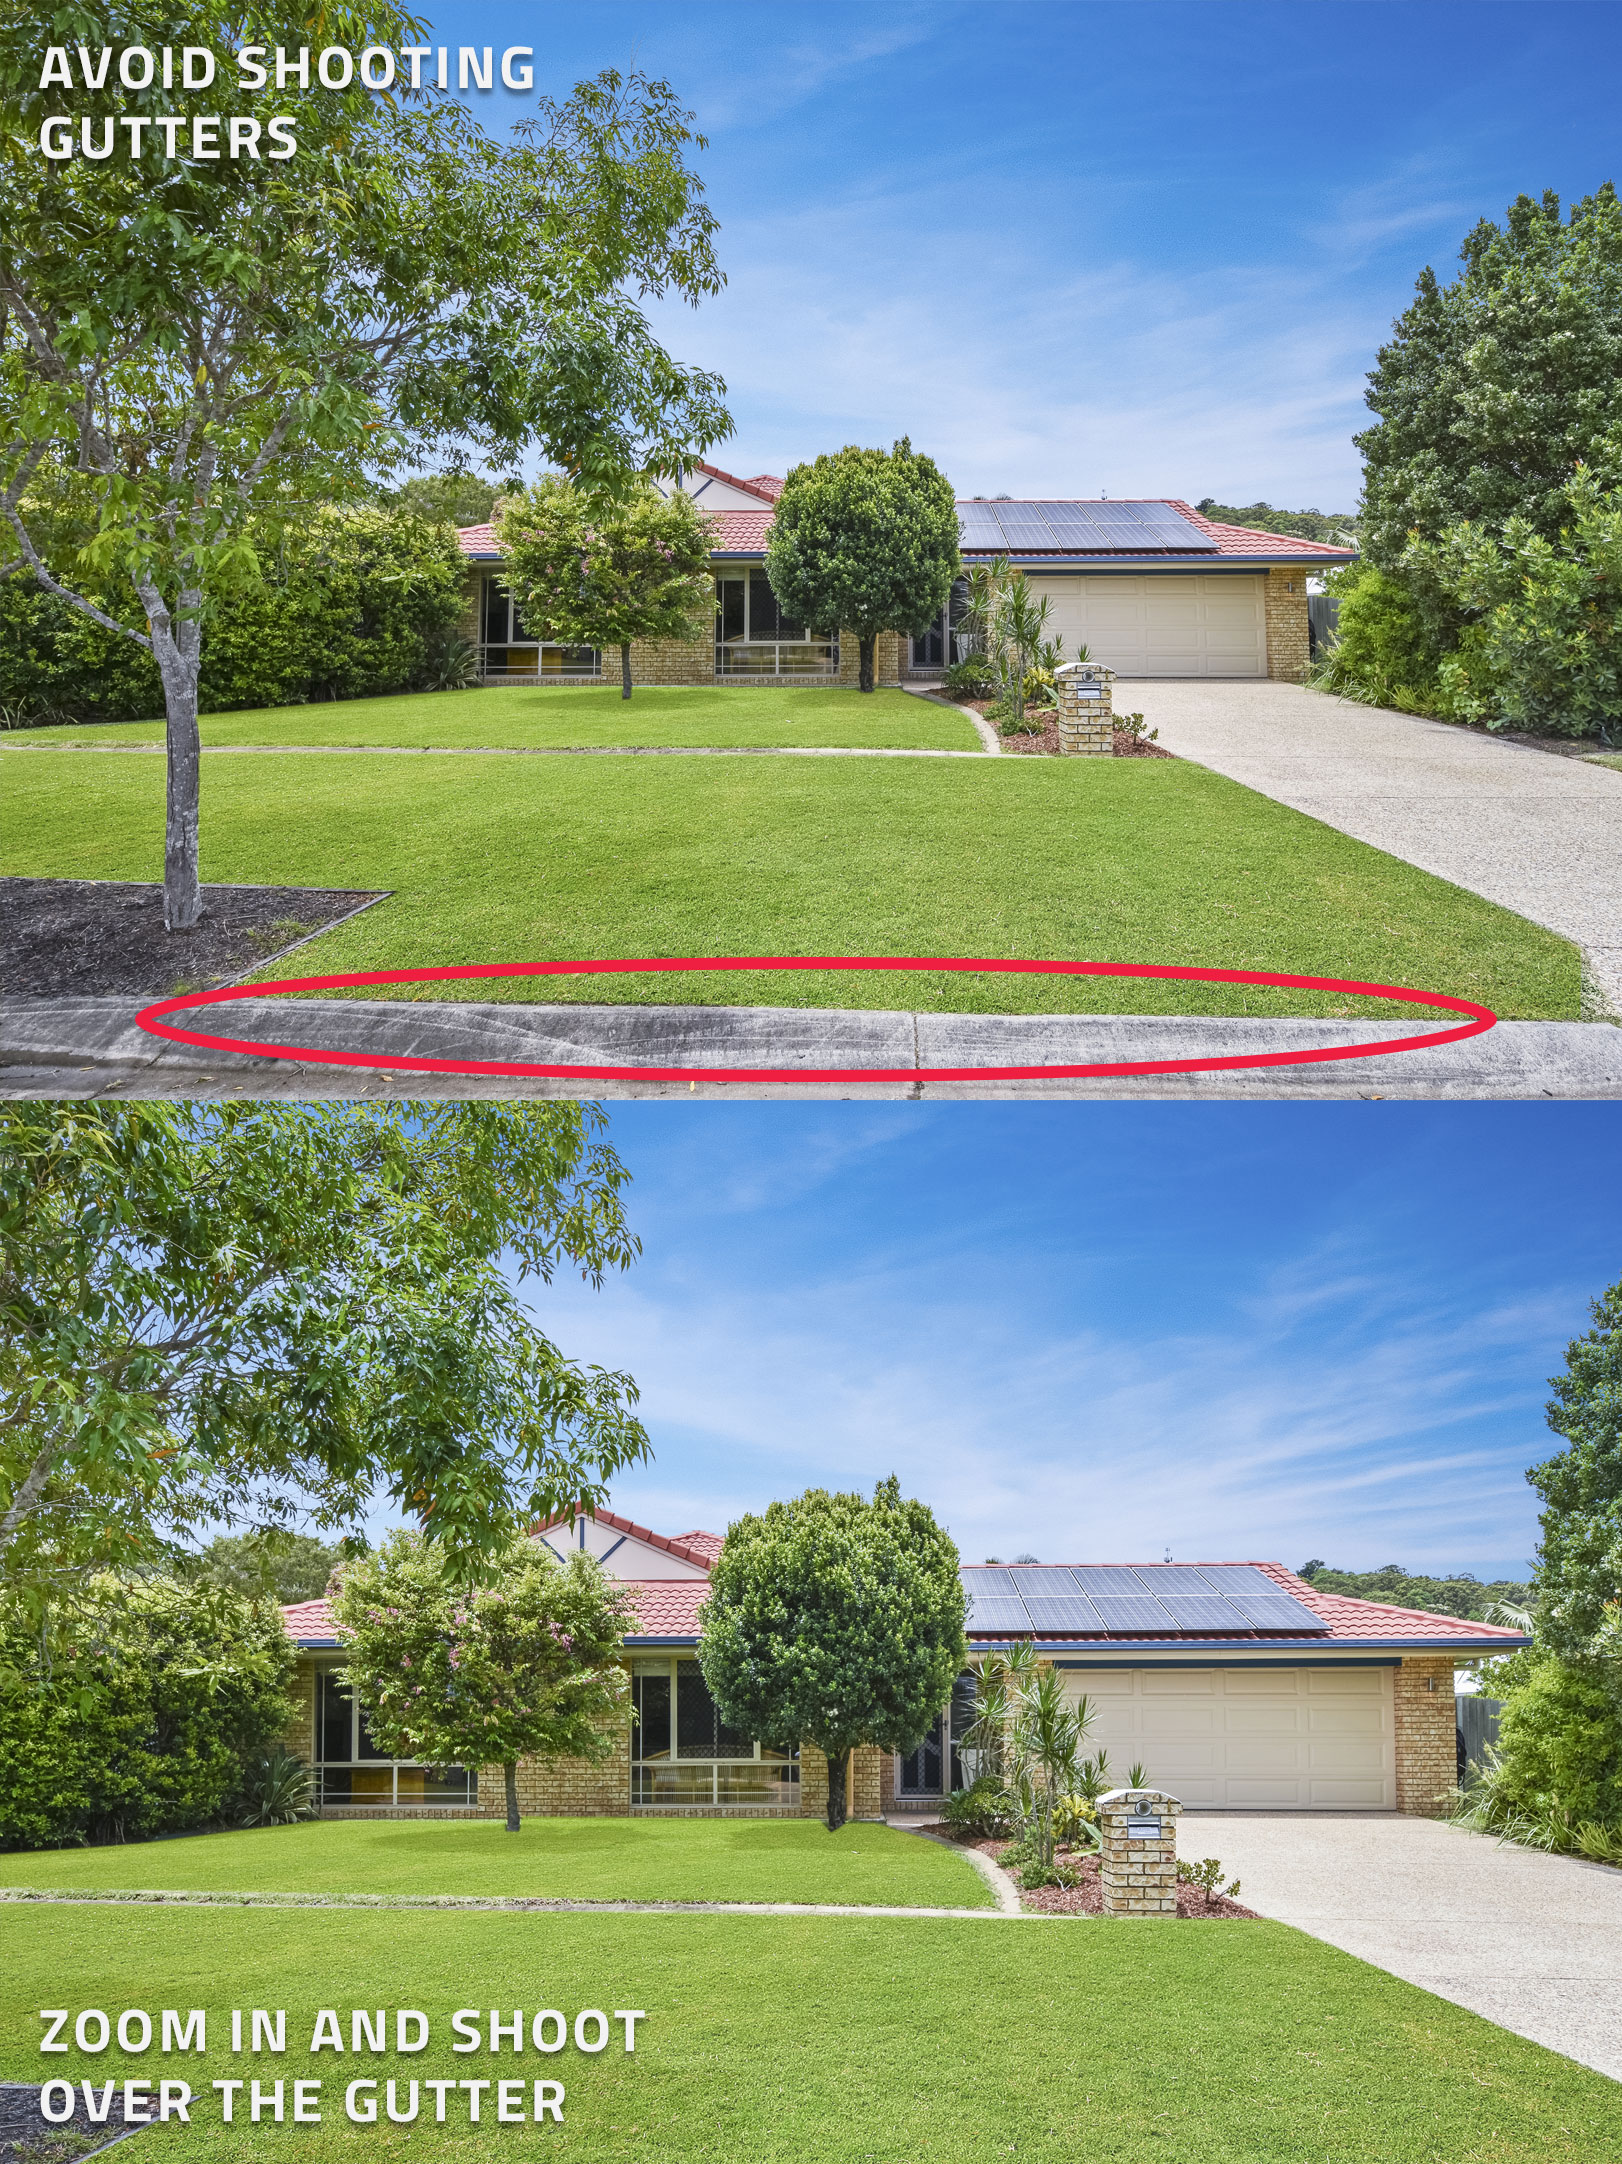
Shooting Exteriors
When shooting exteriors, it is generally good practice to:
1. Include the front garage if the property has one
2. Try and fit in the front door as well
3. Additional items like solar panels are great to feature if the house has them
4. Be mindful of overhead foliage as including this can really make the shot look pretty
5. Don’t shoot gutters. Zoom in if needs be and shoot over it.
So that’s our real estate photography tips for this week! We hope this article taught you a few things to help improve your photography skills.
RELATED ARTICLES
Winter, spring, summer, fall – this edit has it all! Our Season Change edit is back, now part of our Virtual Renovation service. Digitally swap seasons in your property photos to boost curb appeal, keep listings fresh and more. See how your listings can shine in any season!
READ MORE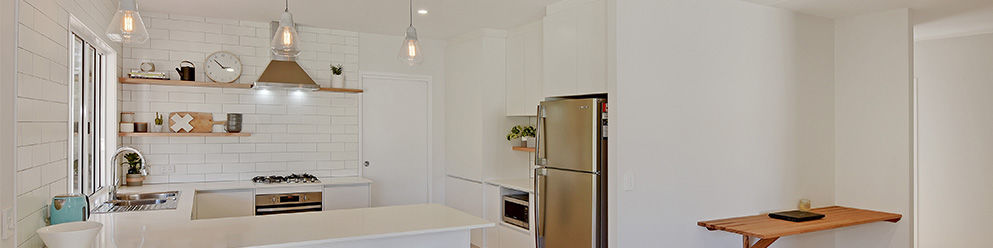
Market your property by standing out from the crowd with an engaging hero shot. Learn the tips to look out for when selecting the right image for your listing.
READ MORE
Stevens Fine Homes saves thousands in staging and rendering costs using BoxBrownie.com. Marketing Manager Naomi Wright Bellamy credits the platform for faster turnarounds, lower costs, and consistently high-quality visuals across every listing.
READ MORE
Elevate your real estate game with Virtual Staging using your iPhone and the SnapSnapSnap app. Brad, our co-founder and photography pro, shares his top tips for setting up, capturing, and editing stunning visuals that will make your listings irresistible to buyers.
READ MORE
Agents across the globe swear by the power of Virtual Staging, but many don't realize they can shoot these images with their own smartphone. This post walks you through just how easy it is, so you'll never be deprived of this phenomenal marketing tool.
READ MORE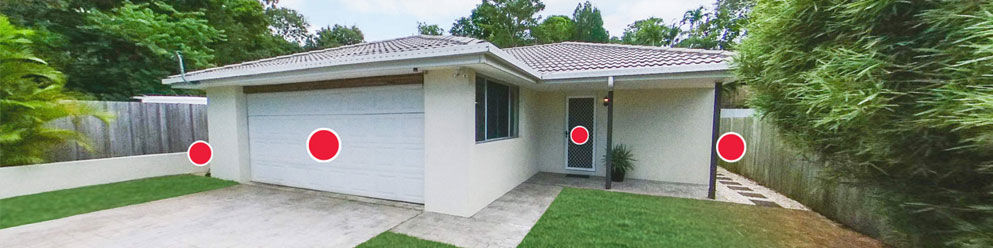
Love the idea of a virtual property tour but don’t want to spend thousands of dollars on expensive equipment or waste hours on the photoshoot? In this tutorial, we take you through our brand new 360° Virtual Tour service and look at how it can revolutionize your property marketing.
READ MORE