HOW TO SHOOT A HOUSE (WORTH $535,000) SO IT SELLS QUICK!
Introduction
As with most things, proper preparation is half the battle and shooting a property is no different. Preparing the property properly can not only save the photographer time but can also ensure the home is presented in the best way possible to showcase its key selling points.
Today we are going to demonstrate this with a real-life example by shooting a four-bedroom, two-bathroom home worth $535,000 that is currently for sale.
Capturing Great Front Exterior Hero Shots 

Get started by lining up your shot, making sure both the driveway and the sky are even. We always recommend you take bracketed images (no flash required for the exterior) when shooting a property. This means when you submit them through for our Image Enhancement edit, we have extensive information to create magazine-ready photos.
It’s always a good idea to get multiple angles of the front of the home including the far left, straight-on and far-right. However, often the photographer, owner and the client will have different preferences so it’s important to be clear on what everyone’s expectations are.
Our Top Tip: Keep the front windows closed to minimize lines when preparing the shot and avoid including footpaths or the neighbour’s antennas. Now that you’re finished at the front of the property, be sure to remove your shoes before heading inside.
Preparing The Interior
Once we move inside, it’s important to prepare the interior of the property before taking any images. Some of the top things to check and be mindful of include:
- Ensure the blinds are pulled down to hide the neighbouring properties
- Only turn on bed-side lights, if both the lights work and are the same brightness
- Hide any shower products in the bottom of the shower or bath
- Close any windows if they are revealing the neighbouring properties
- Ensure the tapware is straight and the toilet paper roll is neat
- Removing bathmats can help ensure the space feels larger and less cluttered
- Usually you won’t shoot the laundry room so there’s no need to prepare it
- It’s a good idea to hide any pedestal fans that are visible
- Close draws and appliances like dishwashers and turn the rangehood light on
- Minimise the number of children’s toys in the living areas to reduce clutter
- Straighten any cushions and hide the television remotes
- Open the sliding doors to create a sense of space while minimising lines
- Hide any plugs in the bathroom, turn the fan off and ensure the towels are neat
- Turn on the central light in the main living area and in the hallway
If you’re looking for an easy guide to ensuring the interior is ready to shoot, you can find our pre-photography checklist here. Next, we will continue onto actually photographing the property.
Shooting The Interior
In this section, we have broken down our key tips for each of the rooms that we will be shooting in this property.
Entry

Always be sure to shoot the entry of the home with the front door open. This gives a really good understanding of what is beyond the door itself.
Our Top Tip: For shooting bracketed images, we recommended shooting 5-7 exposures (-2, -1.0, +1, +2).
Bedroom
 Normally we photograph at 12mm inside the home, however, if you are shooting with bulky items, you can zoom out a little to get the image right. It’s important to show the space off as best as you can.
We are taking two shots for this room, one at 11mm and the other at 12mm to highlight the difference.
Bathroom
 Our Top Tip: Be sure to turn the flash off.
Frame-up your image and don’t worry about the reflections in the mirror or glass, setup your exposures and step out of the room. BoxBrownie.com can then digitally remove the camera in the Image Enhancement stage. Real estate photography doesn’t have to take hours, especially if the house has been prepared correctly.
Second Bedroom
 For this shot we are going to move back to 12mm and be sure to include the door frame in the image. This helps gives the photo context and helps to give perspective to the potential buyer.
Third Bedroom
 In this case, we will be shooting the room at 12mm or 16/17mm if you are operating with a full frame. This is especially important when you have a bulky robe next to the door, otherwise if you include it, you have the risk of making the room look overcrowded.
 Second Bathroom
 As with the first bathroom, no flash is needed in this shot. By shutting the adjacent door, it’s possible to minimise the reflections while hiding any items reduces clutter. In this case, this shot looks better without the door/door frame included.
Fourth Bedroom
 We have given this shot a little extra height to hide the neighbouring property and for this image, only part of the door/door handle has been included and none of the door frame.
“Having a home presented for the photographer is paramount as photographers are not cleaners or removalists. It is our job to get creative by recognising the best angles to sell a home and for us to do that, it needs to be prepared for us.” - Brad Filliponi.
Entry to Kitchen
 As you can see, this is the perfect angle to give the potential buyer a feel for how the flow of this house really works.
Kitchen Gallery
 Shooting the kitchen in a low shot can look nice however it’s important to only do this if you can still hide the neighbors.
 This is a great image for creating a real sense of space. In this case, it’s a good option to have the door open, bringing a natural flow to the shot and highlighting the space from the entry to the kitchen, including the hallway.
Our Top Tip: Everyone has personal preferences when it comes to the best images to sell a property. It simply comes down to asking the client what they would like, whether it is the owner or the agent themselves.
Living

We always recommend shooting at eye level for each room as it makes the photo look and feel more realistic, while also giving proper perspective to the viewer.
Dining
 We have included the entry and the hallway here, again, to give a feel for the layout while also ensuring the lights are turned on.
Indoor/Outdoor Entertaining

 In this image, it’s important that we’re able to capture how the eating area flows outside, allowing for that enviable indoor-outdoor lifestyle.
Shooting The Exterior
Outdoor
By positioning ourselves properly, we have been able to highlight the entertaining area directly from the door out to the backyard.
 Always aim to capture an image that takes in the majority of the backyard to showcase the amount of space on offer.
In this image, we have included the larger side of the house and created more depth rather than shooting straight-on. Again, this is designed to show the scale of the property.
Our Top Tip: If you’re shooting towards the sun, use your hand to shield the sun to minimize overexposure. Without taking this into account, you can be left with spots in your images.
Conclusion
We always recommend, where possible, that you confirm the images you have taken with your client to ensure they are happy and you have filled the brief, before leaving the property.
We hope the key tips outlined in this blog have been valuable and can be used for your next property. If you’re searching for more informative blogs like this, visit our website and for other key tips on property marketing be sure to follow us on social media.
RELATED ARTICLES
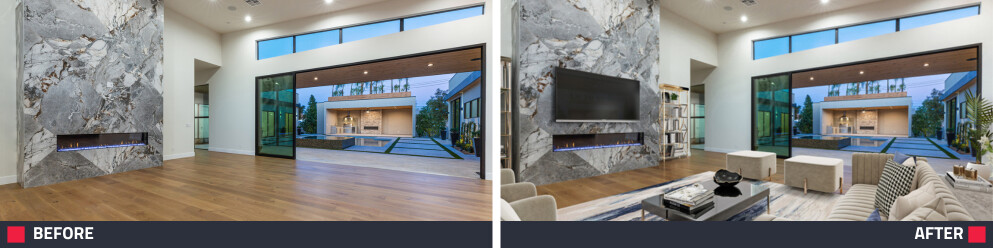
Don't think virtual staging is for luxury listings? Think again! We’ll show you how to transform high-end properties into stunning, buyer-ready homes. Boost engagement, accelerate sales, and make your listings stand out in a competitive market!
READ MORE
Eager to experiment with 360-degree virtual tours but are nervous about spending too much time and money getting started? In this blog, we put three of the best 360-degree budget cameras to the test to understand if it's possible to produce professional-quality virtual tours for real estate without breaking the bank.
READ MORE
Patchy lawns can kill curb appeal — but digital edits come with rules. Learn how to enhance your listing ethically, stay MLS-compliant, and wow buyers without misleading them. Click to see our expert tips!
READ MORE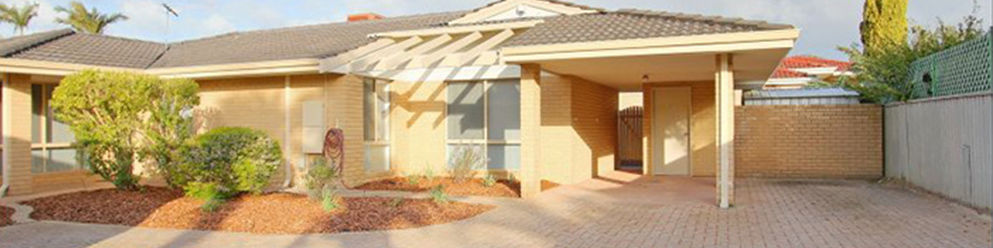
In this blog, we are going to go through a listing for a rental property and make suggestions on how you can take your marketing to the next level.
READ MORE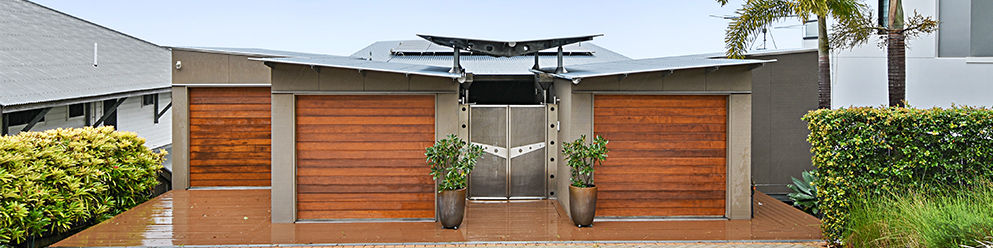
You don't need to wait for ideal weather to shoot a property. Learn these simples tips for shooting in wet weather.
READ MORE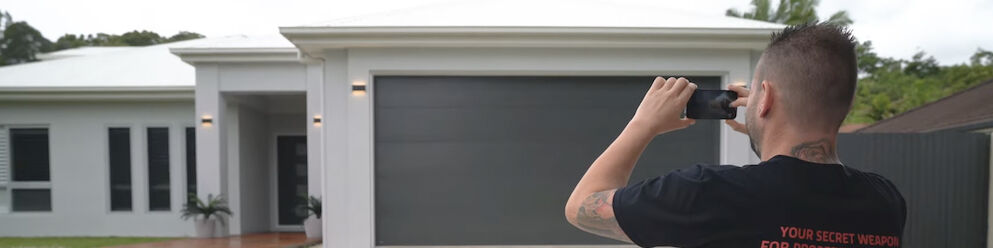
If you think quality, professional real estate images aren’t in your budget – think again! For under $20 you can beautifully showcase a property that will boost listing inquiries and your brand. How? Just follow our how-to guide.
READ MORE